Deadly DIYs just in time for Halloween
Because there's more to Halloween crafting than carving pumpkins.
October 29, 2020 12:23 p.m. EST
October 29, 2020 12:23 p.m. EST

Looking for Halloween decor that goes beyond the typical spider webs and carved pumpkins? If you're ready to put your DIY skills to the test and put a fun twist on the season, we've got you covered. Interior designer Steven Sabados showed us five show-stopping DIYs that take spooky season to the next level. Happy crafting!
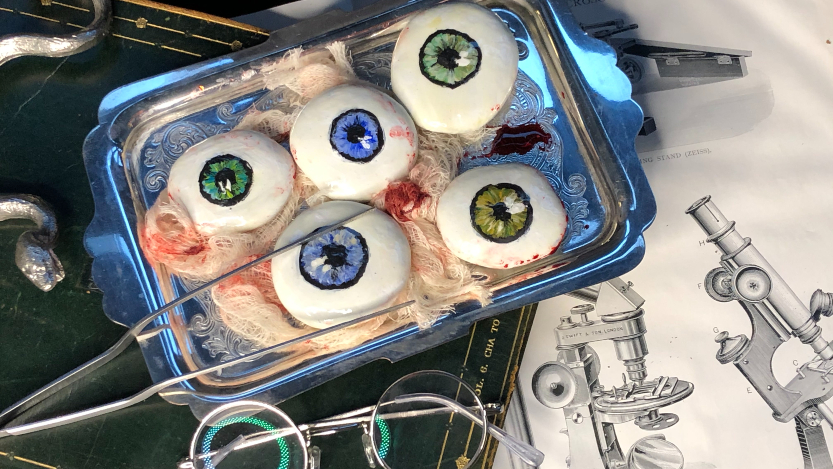
ROCK PAINTED EYES

Materials
- smooth pebbles (roughly 3’’ diam.)
- high adhesion primer paint
- acrylic artist paint in black, blue, green, white
- acrylic gloss varnish/top coat
- a variety of small artist brushes
Directions
- Google images of eyes and print them out to use as reference for painting.
- Collect smooth rocks from the beach, your backyard, or a décor store.
- Paint the rocks white using a high adhesion paint and let them dry.
- Using acrylic paint, paint a black circle in the center of the rock. This will be the background for the iris.
- Using acrylic paint, paint in the colour of the iris. Feel free to use blue, green or any colour you like. Paint using small brush strokes from the outside of the iris to the center and let it dry.
- Paint in the pupil using black acrylic paint, then paint in a few white highlights near the edge of the pupil.
- Once dry, coat the entire project using a gloss varnish.
- Let it completely dry one last time and display on a fancy tray.
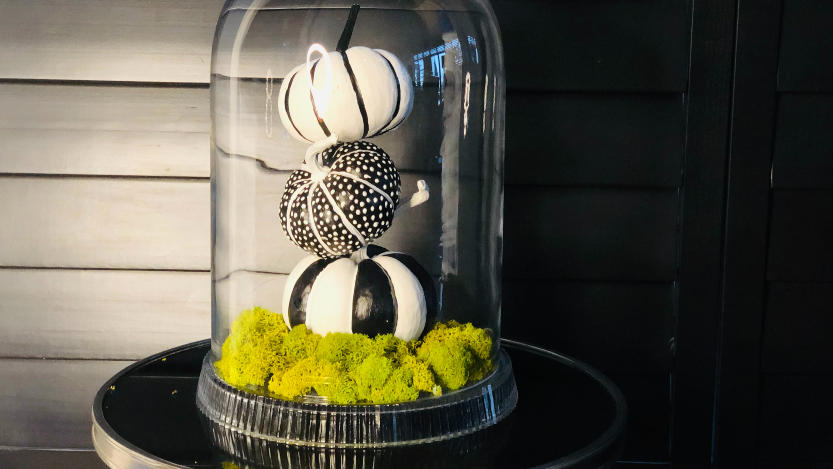
BLACK AND WHITE GOURDS

Materials
- selection of small gourds
- high adhesion white primer paint or artist Gesso
- black acrylic artist paint
- puffy paint in black or white (dimensional paint with small tip applicator for polka dots)
- toothpicks
Directions
- Paint the gourds white using acrylic or latex paint and leave to dry.
- Follow the linear pattern of the gourd to paint sections using alternating black and white acrylic paint.
- Paint polka dots, stripes, or any black and white pattern.
- Display in any manner, or stack by securing them using toothpicks.
- Place under a cloche for a glamorous presentation.
PAINTED GOURD SPIDERS

Materials
- selection of gourds
- yellow acrylic artist paint
- black puffy or dimensional paint with fine tip applicator
- wire hangers cut into 4’ lengths
- black electrical tape
Directions
- Paint the gourds using the bright yellow acrylic paint and leave to dry.
- Using a small fine brush and black acrylic paint or a black puffy paint with a small nozzle, paint patterns on the gourd using only polka dots.
- To create the spider legs, cut metal coat hangers into 3’’-4’’lengths. Wrap the cut pieces using black electrical tape. Create 8 legs per gourd.
- Insert the “legs” into the gourd and position them to resemble the stance of a spider.
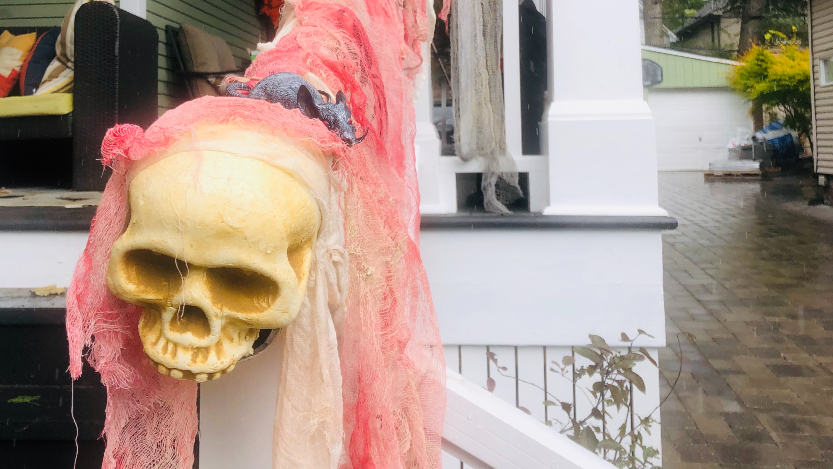
HALLOWEEN CANDY CHUTE

Materials
- piece of 4-5’’ diameter PVC pipe
- gauze
- zip ties or wire to secure tube to railing
- hot glue
- collection of small spooky characters to decorate (mice, bats, spiders, etc.)
Directions
- Decide the best place to install the chute. The top of a railing is easiest.
- Purchase a length of PVC tubing from the hardware store. The one used in this DIY was 5’’ x 6".
- Paint the PVC tube white using a high adhesion white paint and leave it to dry.
- Secure the tube to the top of the railing using zip ties or wire.
- Place a plastic skeleton at the top of the tube and secure with zip ties. Place a plastic or foam skull at the end of the tube using zip ties and hot glue if needed. Make sure you do not obstruct the candy from coming out the end.
- Wrap the tubing in gauze. Feel free to spray in a mixture of tea to discolour the cloth, and even splash some red paint if you want a bloody effect.
- Secure the gauze in places using hot glue.
- Add some spooky characters, such as plastic spiders or bats.
- Slide candy down the chute and have fun!
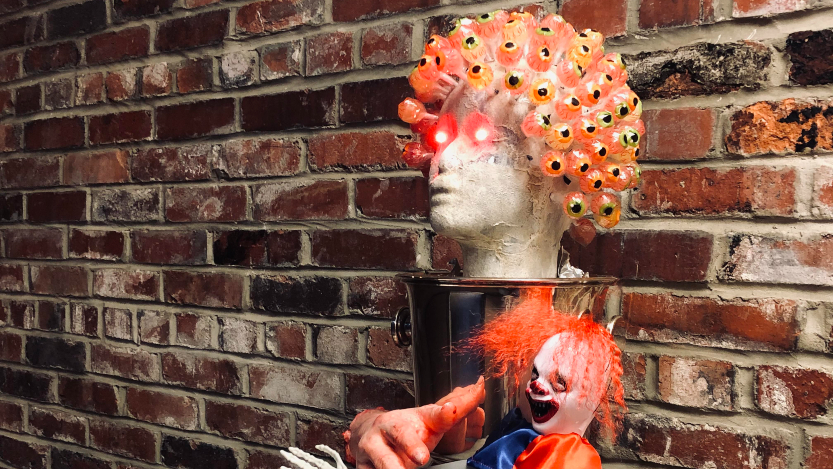
HELLRAISER LOLLIPOP HEAD

Materials
- styrofoam wig head
- gauze
- decoupage glue
- skewer
- container or bucket to display in
- few bags of lollypops or candy suckers
Directions
- Purchase a foam wig head from your local dollar or wig store.
- Cut gauze into 4’’ pieces and decoupage onto the foam head to create texture.
- Dry brush grey acrylic paint onto the head form to make it look mottled.
- Using a skewer, poke a small hole into the head and insert a lollypop into the hole. Repeat until the head is full of lollipops.
- Secure the head into a container, bucket, or anything spooky.
- Place on your front porch and using a handmade sign.


