DIY Halloween décor you can whip up at the last minute
Three projects for when you're in a pinch on Halloween night.
October 29, 2021 10:31 a.m. EST

When you think of Halloween, costumes and candy are usually the first things that come to mind. But what about the decor? Designer Steven Sabados shares three creative ideas that will ensure every inch of your house will look unique and festive for the season.
Punk rock candy kebobs
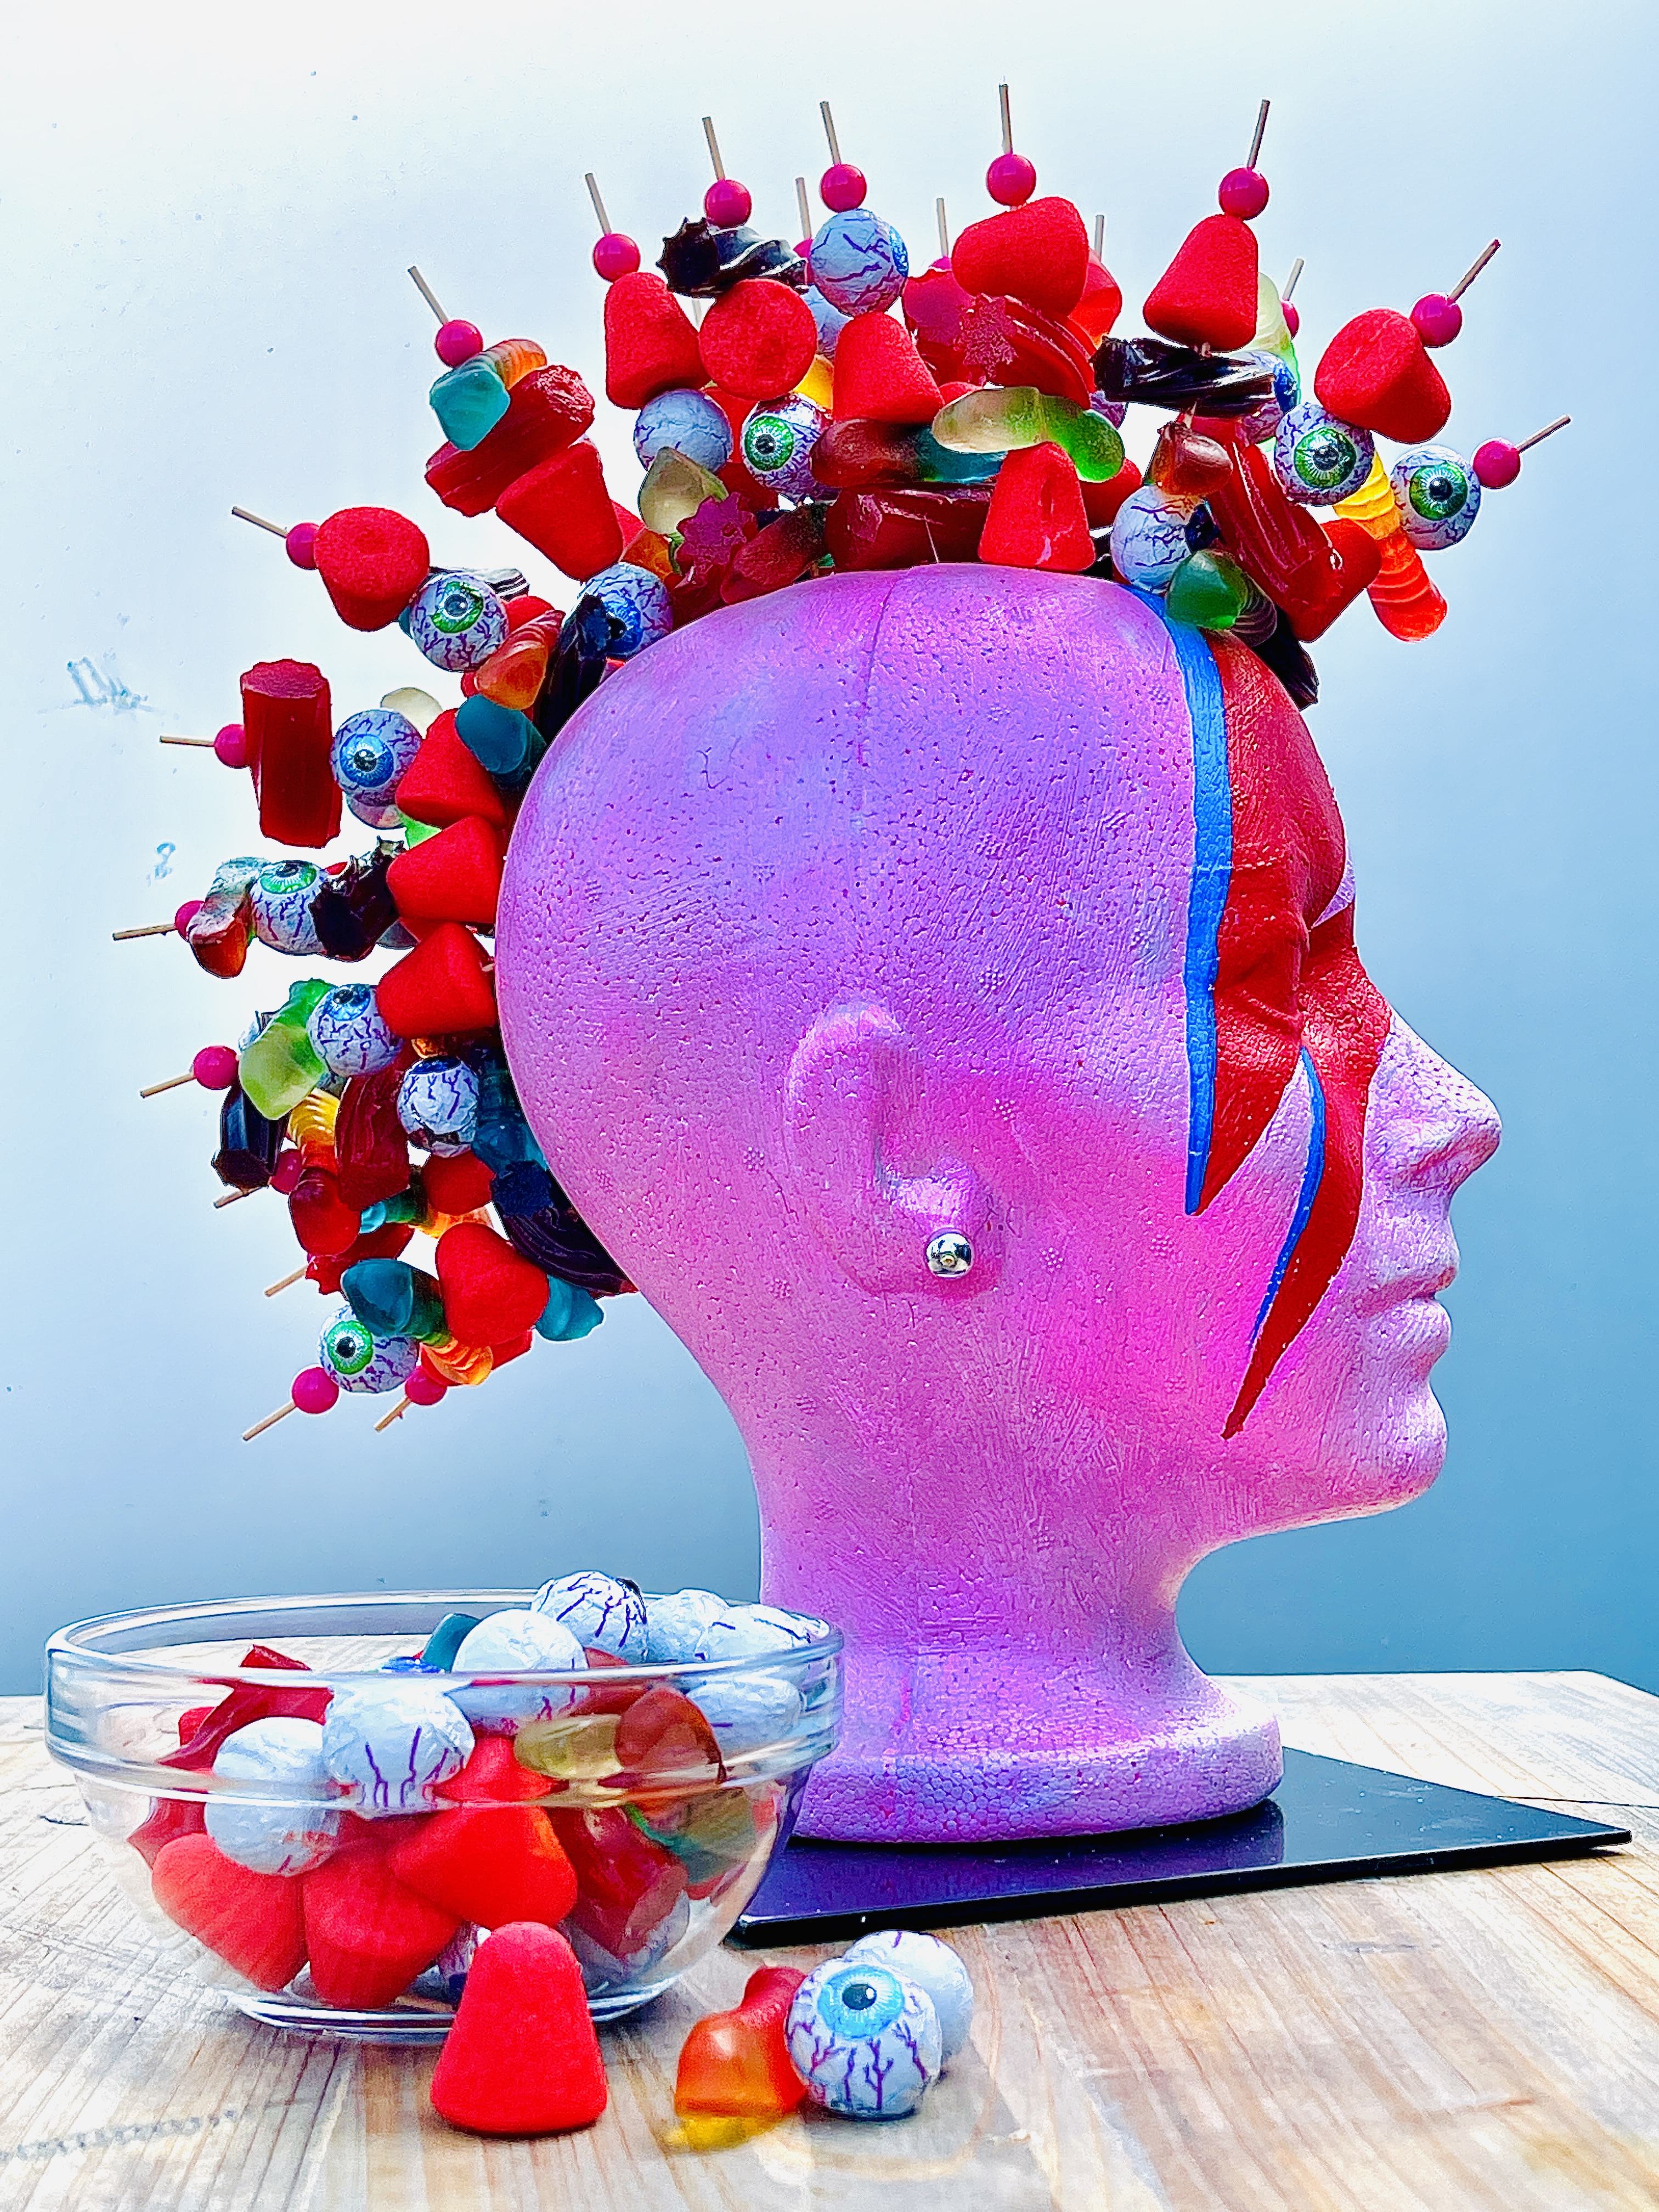
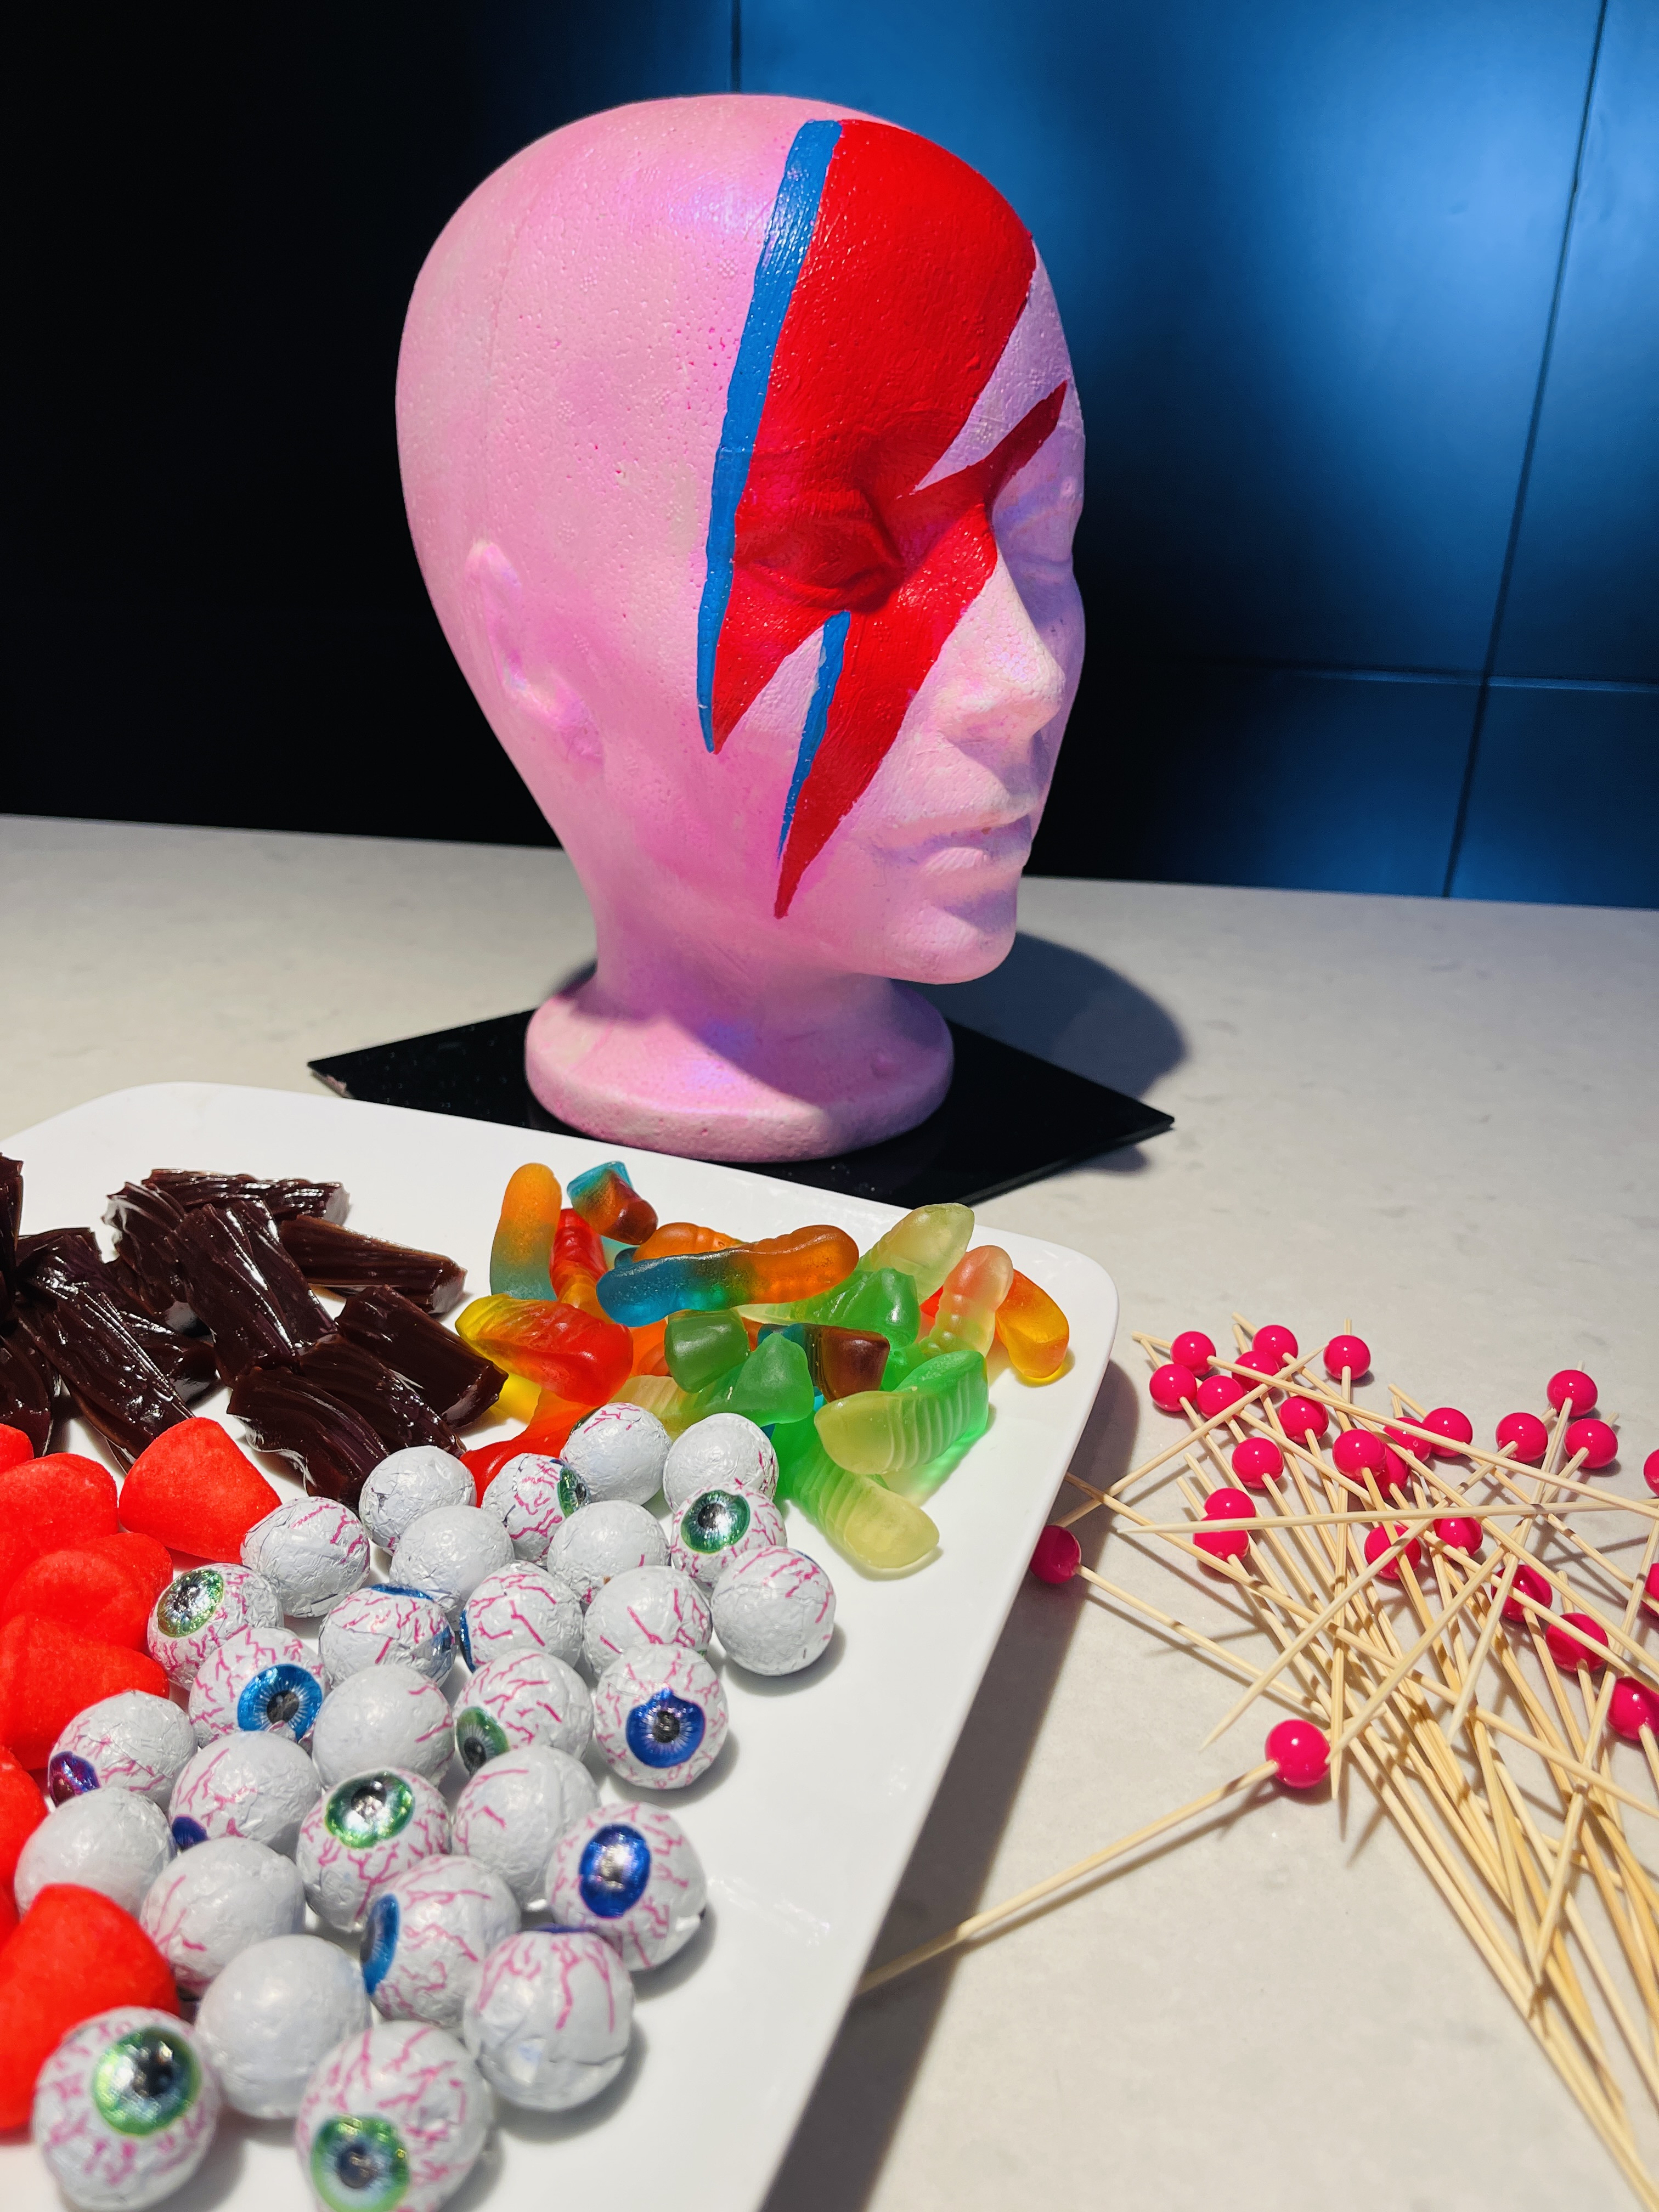
Photo Courtesty: Steven Sabados
Materials needed:
- Acrylic paint
- Styrofoam
- Halloween candies and treats
- Wooden skewers
Steps:
- Using acrylic paint, paint a styrofoam head in whatever colour scheme you like. Steven was inspired by David Bowie’s Ziggy Stardust character.
- Purchase a plethora of Halloween candies and treats.
- Create colourful kabobs on wooden skewers.
- Insert the skewers into the foam head to form a hairstyle.
- Make sure the skewers are even so the head does not tip over, display and enjoy!
Halloween spell books
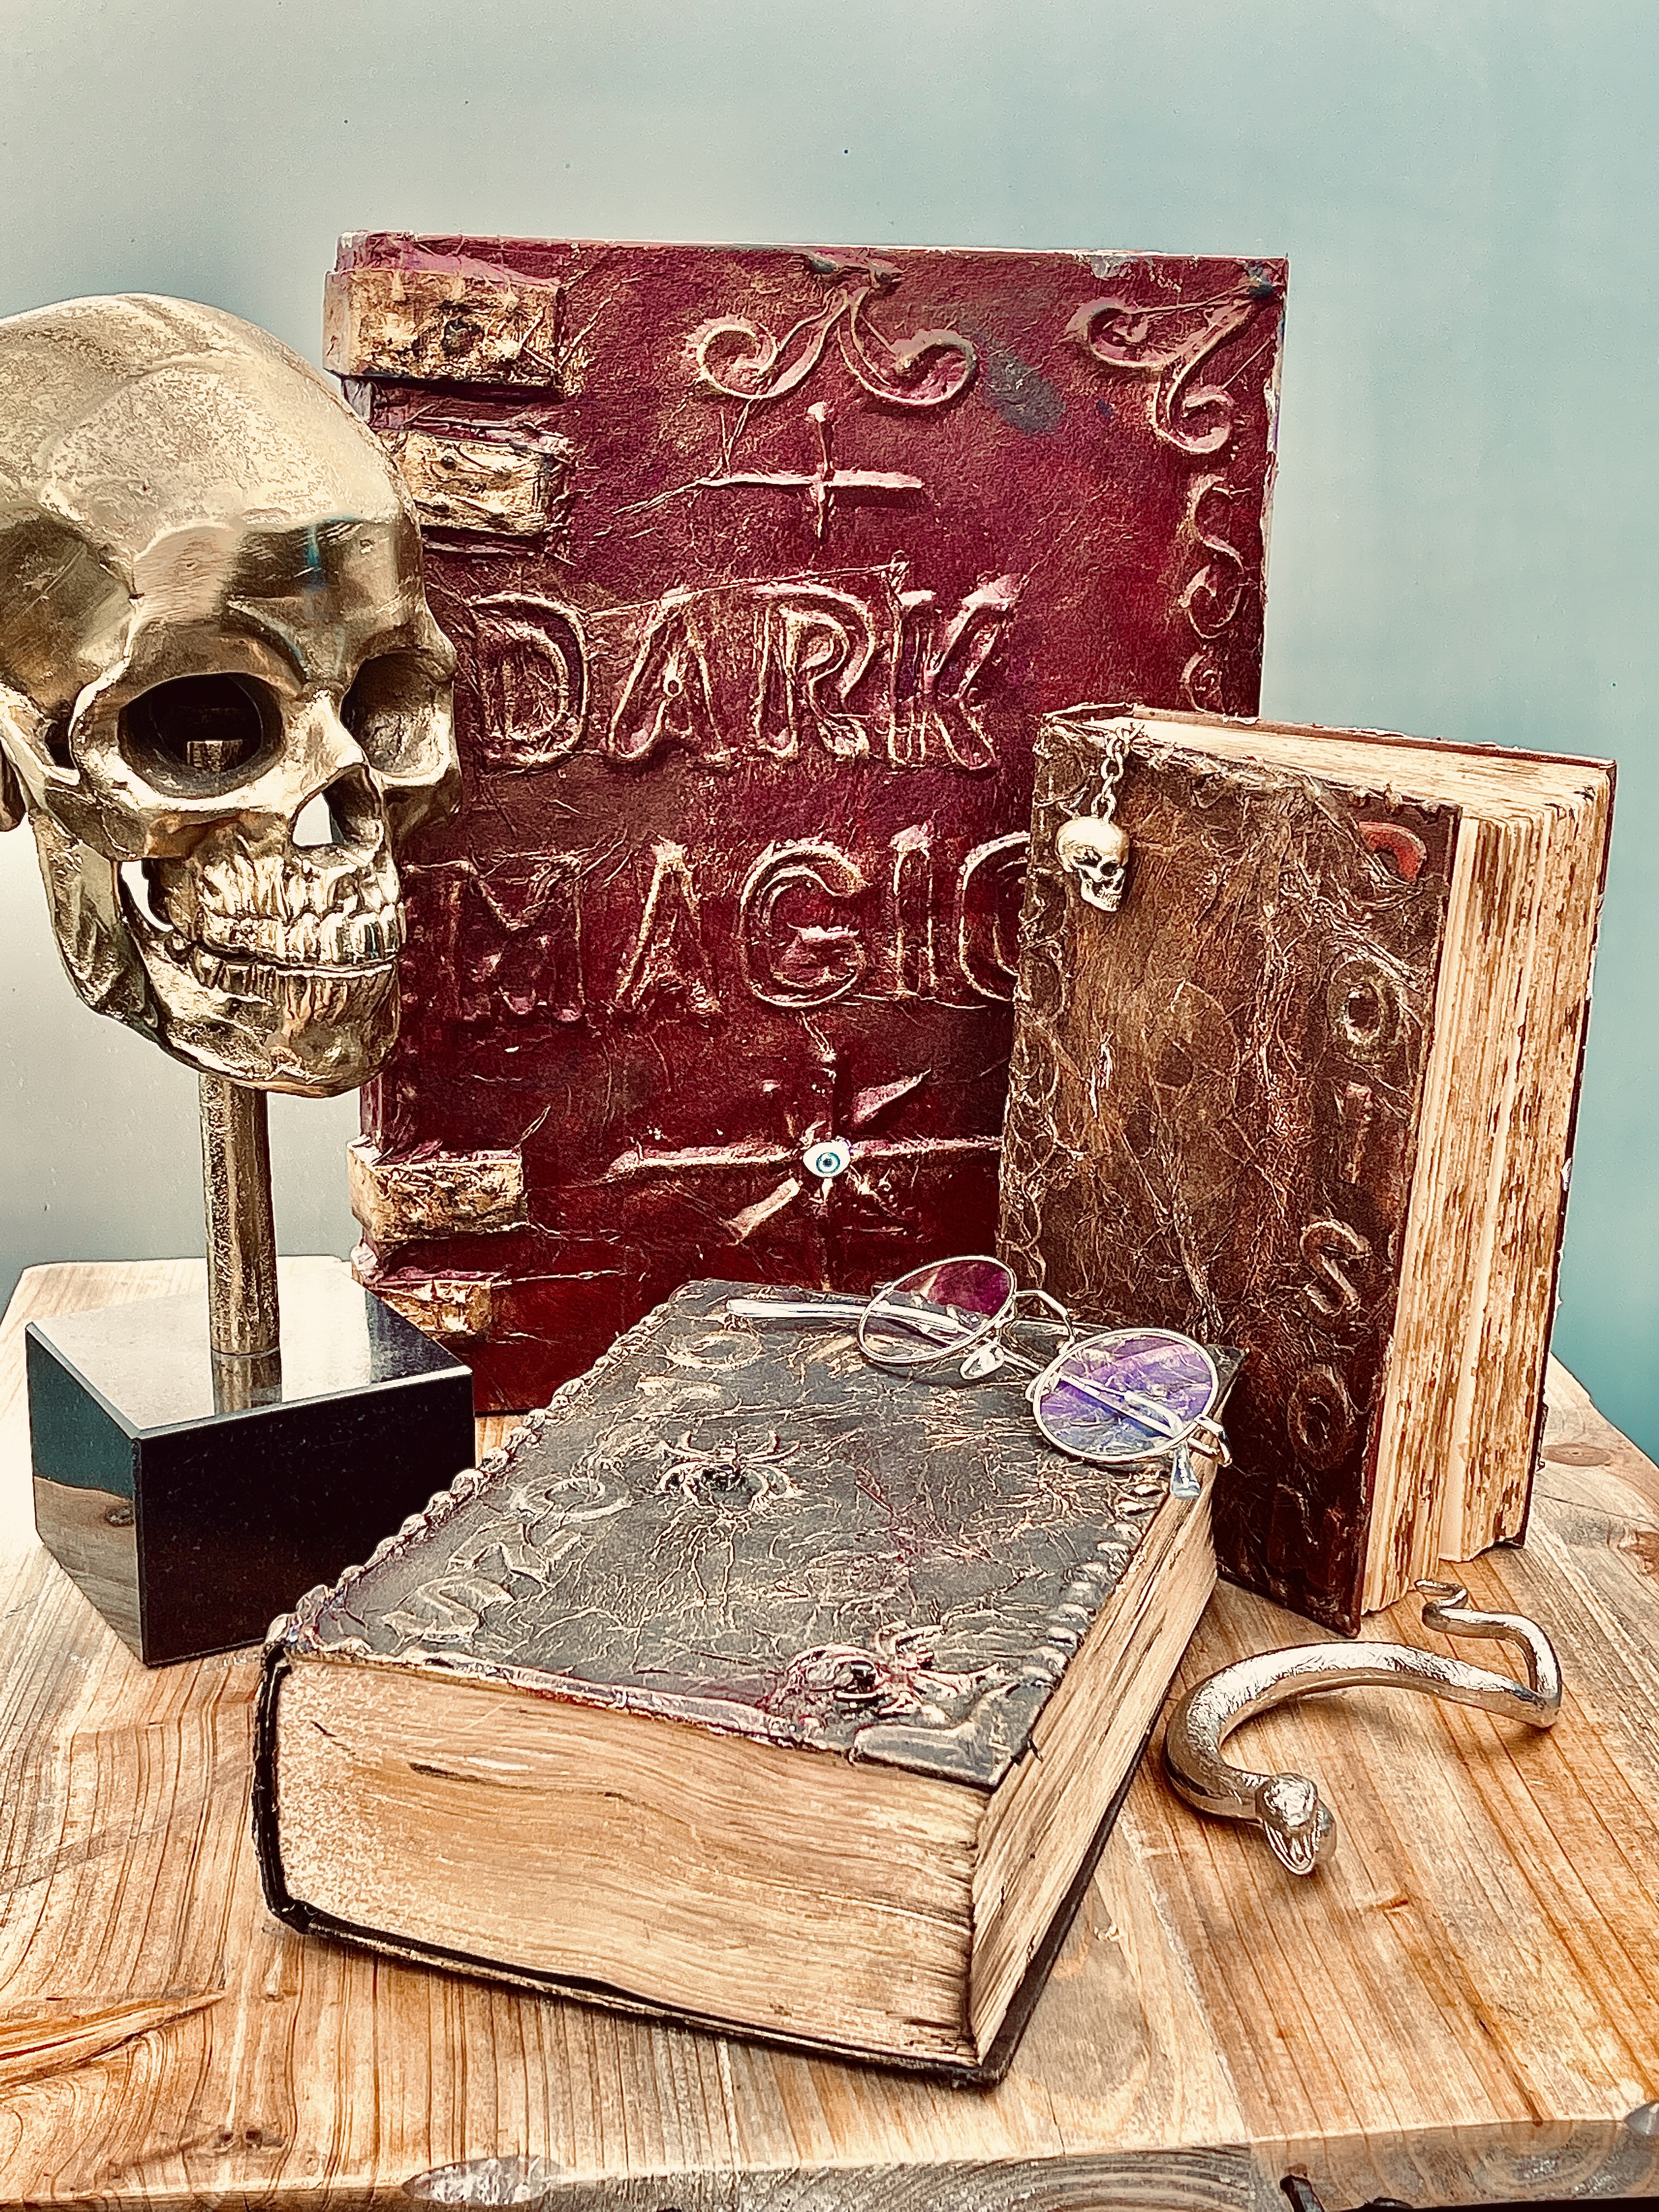
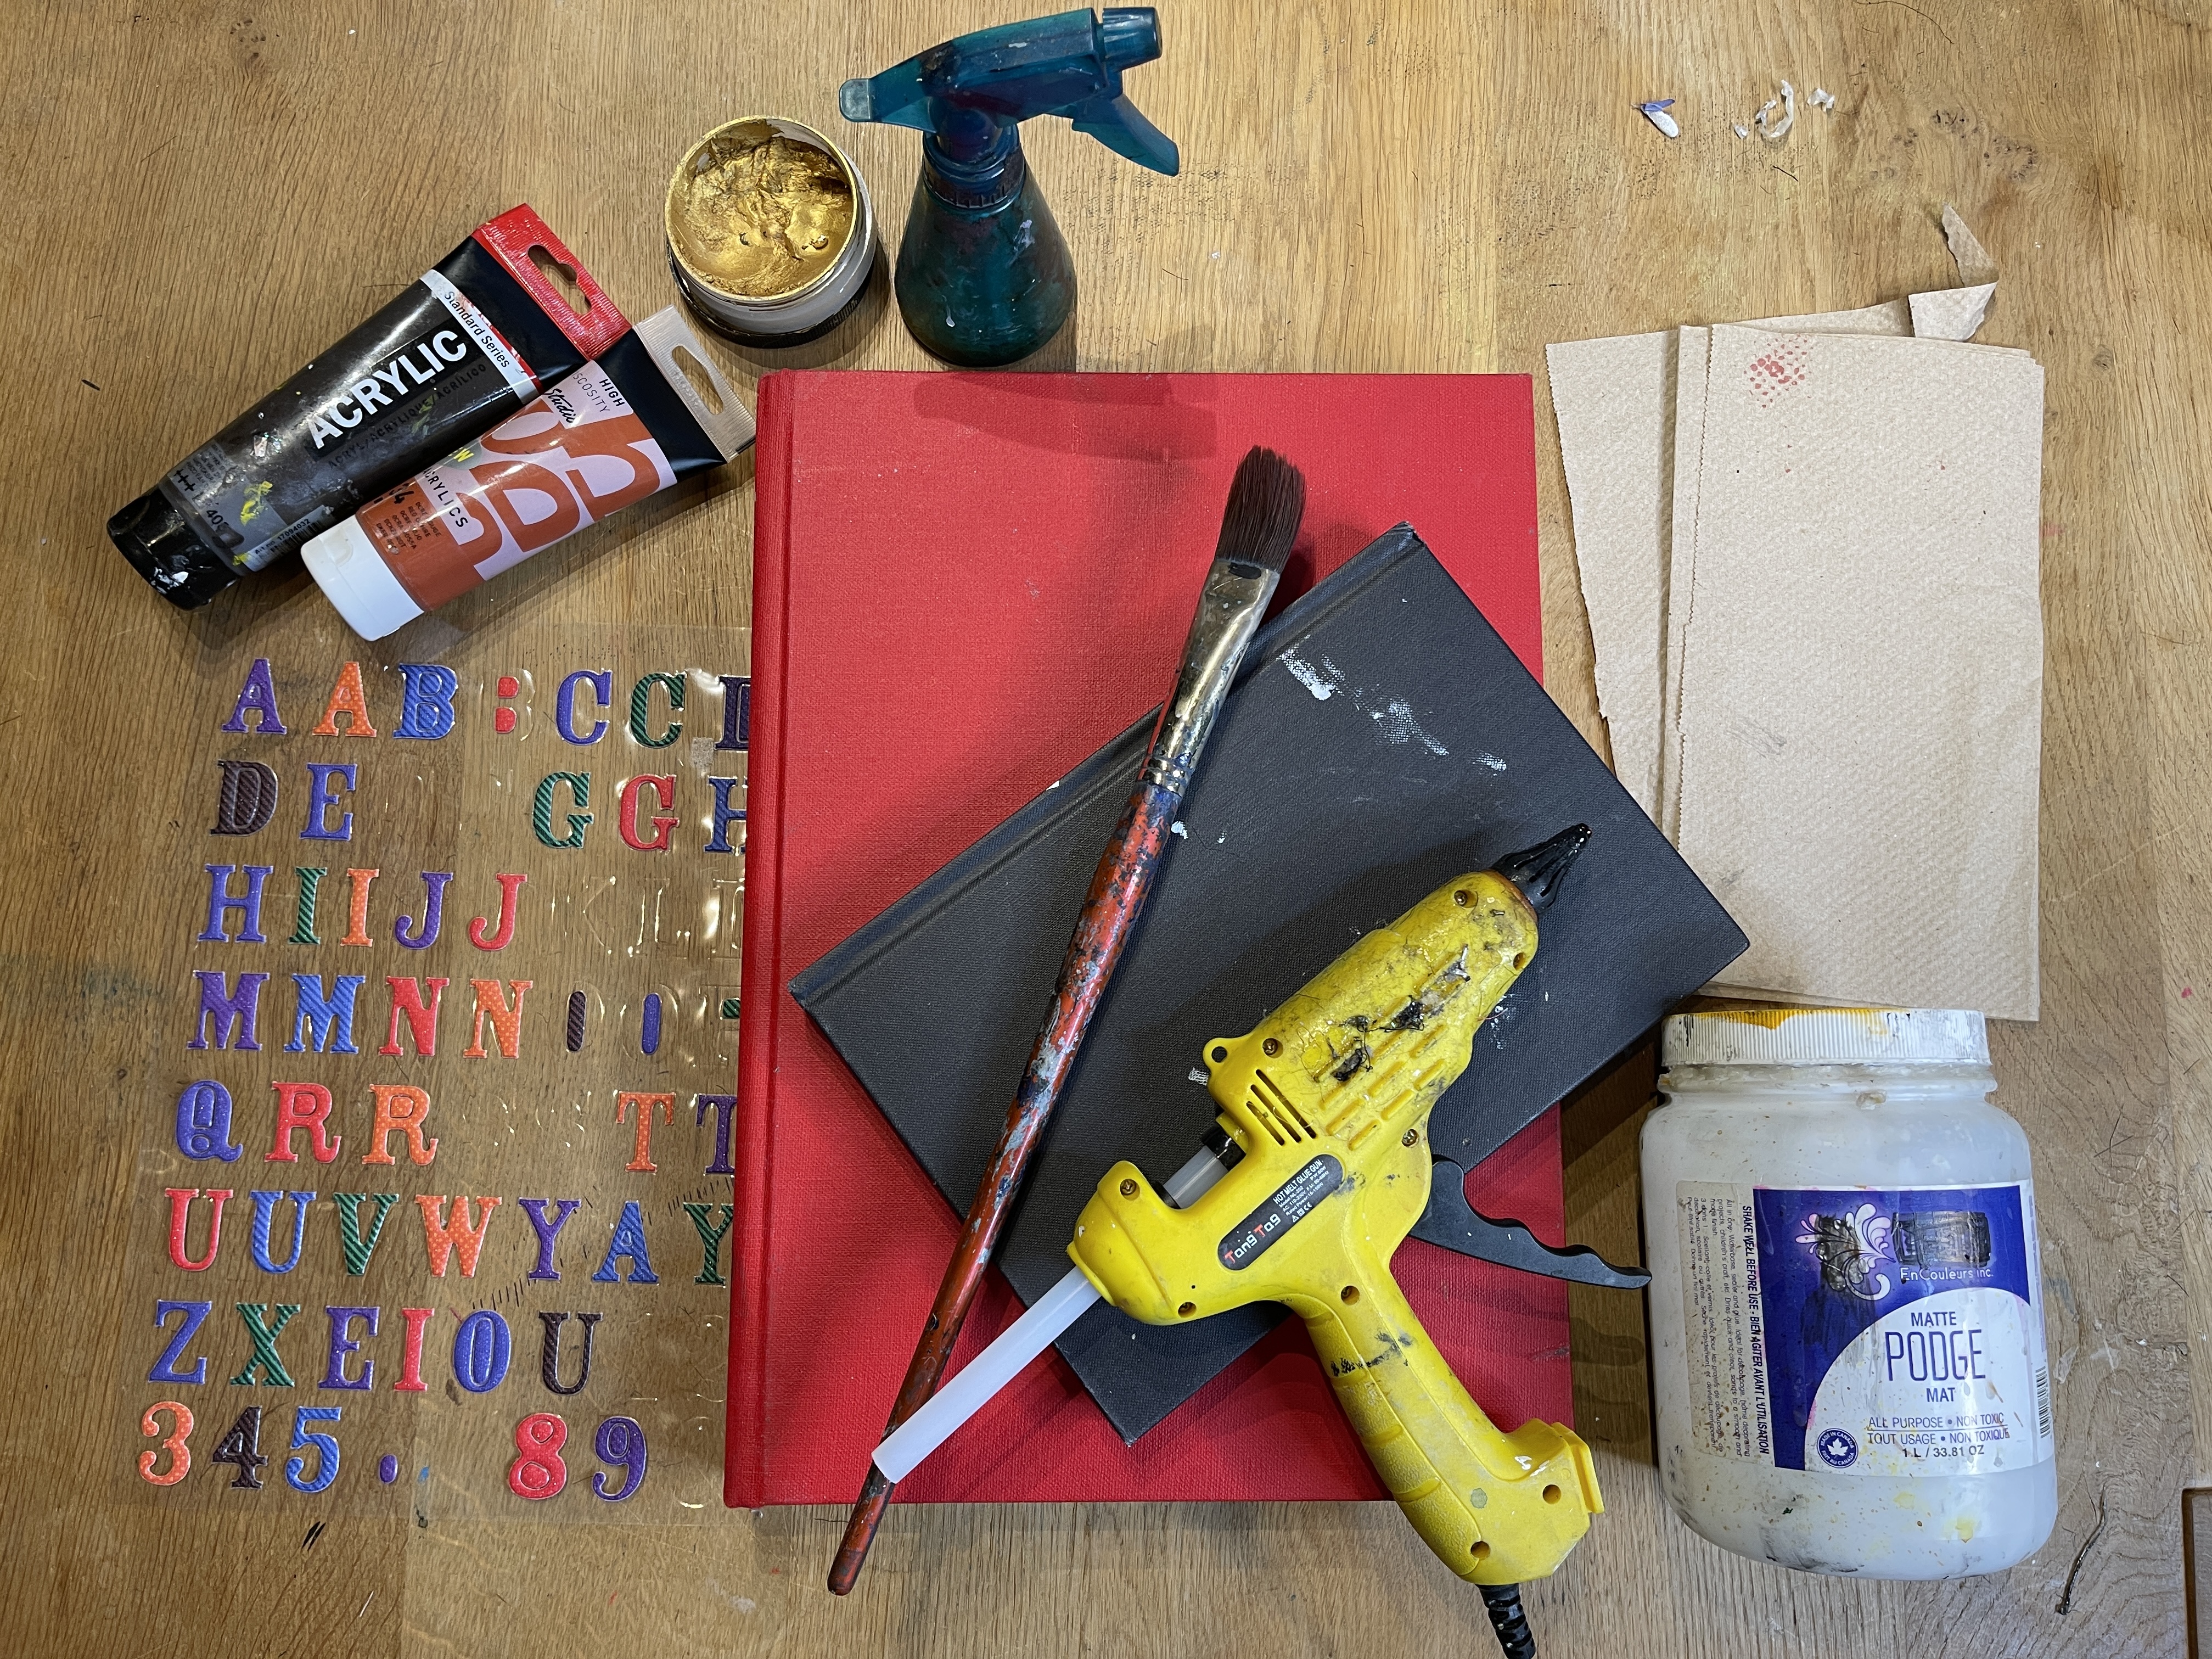
Photo Courtesty: Steven Sabados
Materials needed:
- Various sizes of old secondhand books
- Glue gun and glue sticks
- Podge and soft brush or paper towels (white or brown)
- Puffy adhesive letters
- Small spray bottle
- Acrylic paint (raw umber, burgundy, brown)
- Gold burnishing wax or gold acrylic paint
- Embellishments, plastic spiders, plastic eyes, etc...
Steps:
- In the spray bottle, mix water and a small amount of raw umber acrylic paint. Spray in between all the pages to age and wrinkle them.
- On the front cover adhere (or glue) the letters to describe the book (Examples: Spells, Magic, etc...)
- Use the glue gun to draw on any additional details on the cover, the spine and back cover. (let dry) You can also glue on small spiders, worms or other embellishments.
- Apply a thin coat of podge to the front of the book and start to decoupage small torn pieces of paper towel to the entire cover, and repeat until entire book is covered. Let dry
- Paint the entire book in acrylic paint of your choice. Let it dry.
- Using the gold wax or gold acrylic paint, gently brush over to highlight areas of the lettering and the raised details. Let dry and display.
Giant bats
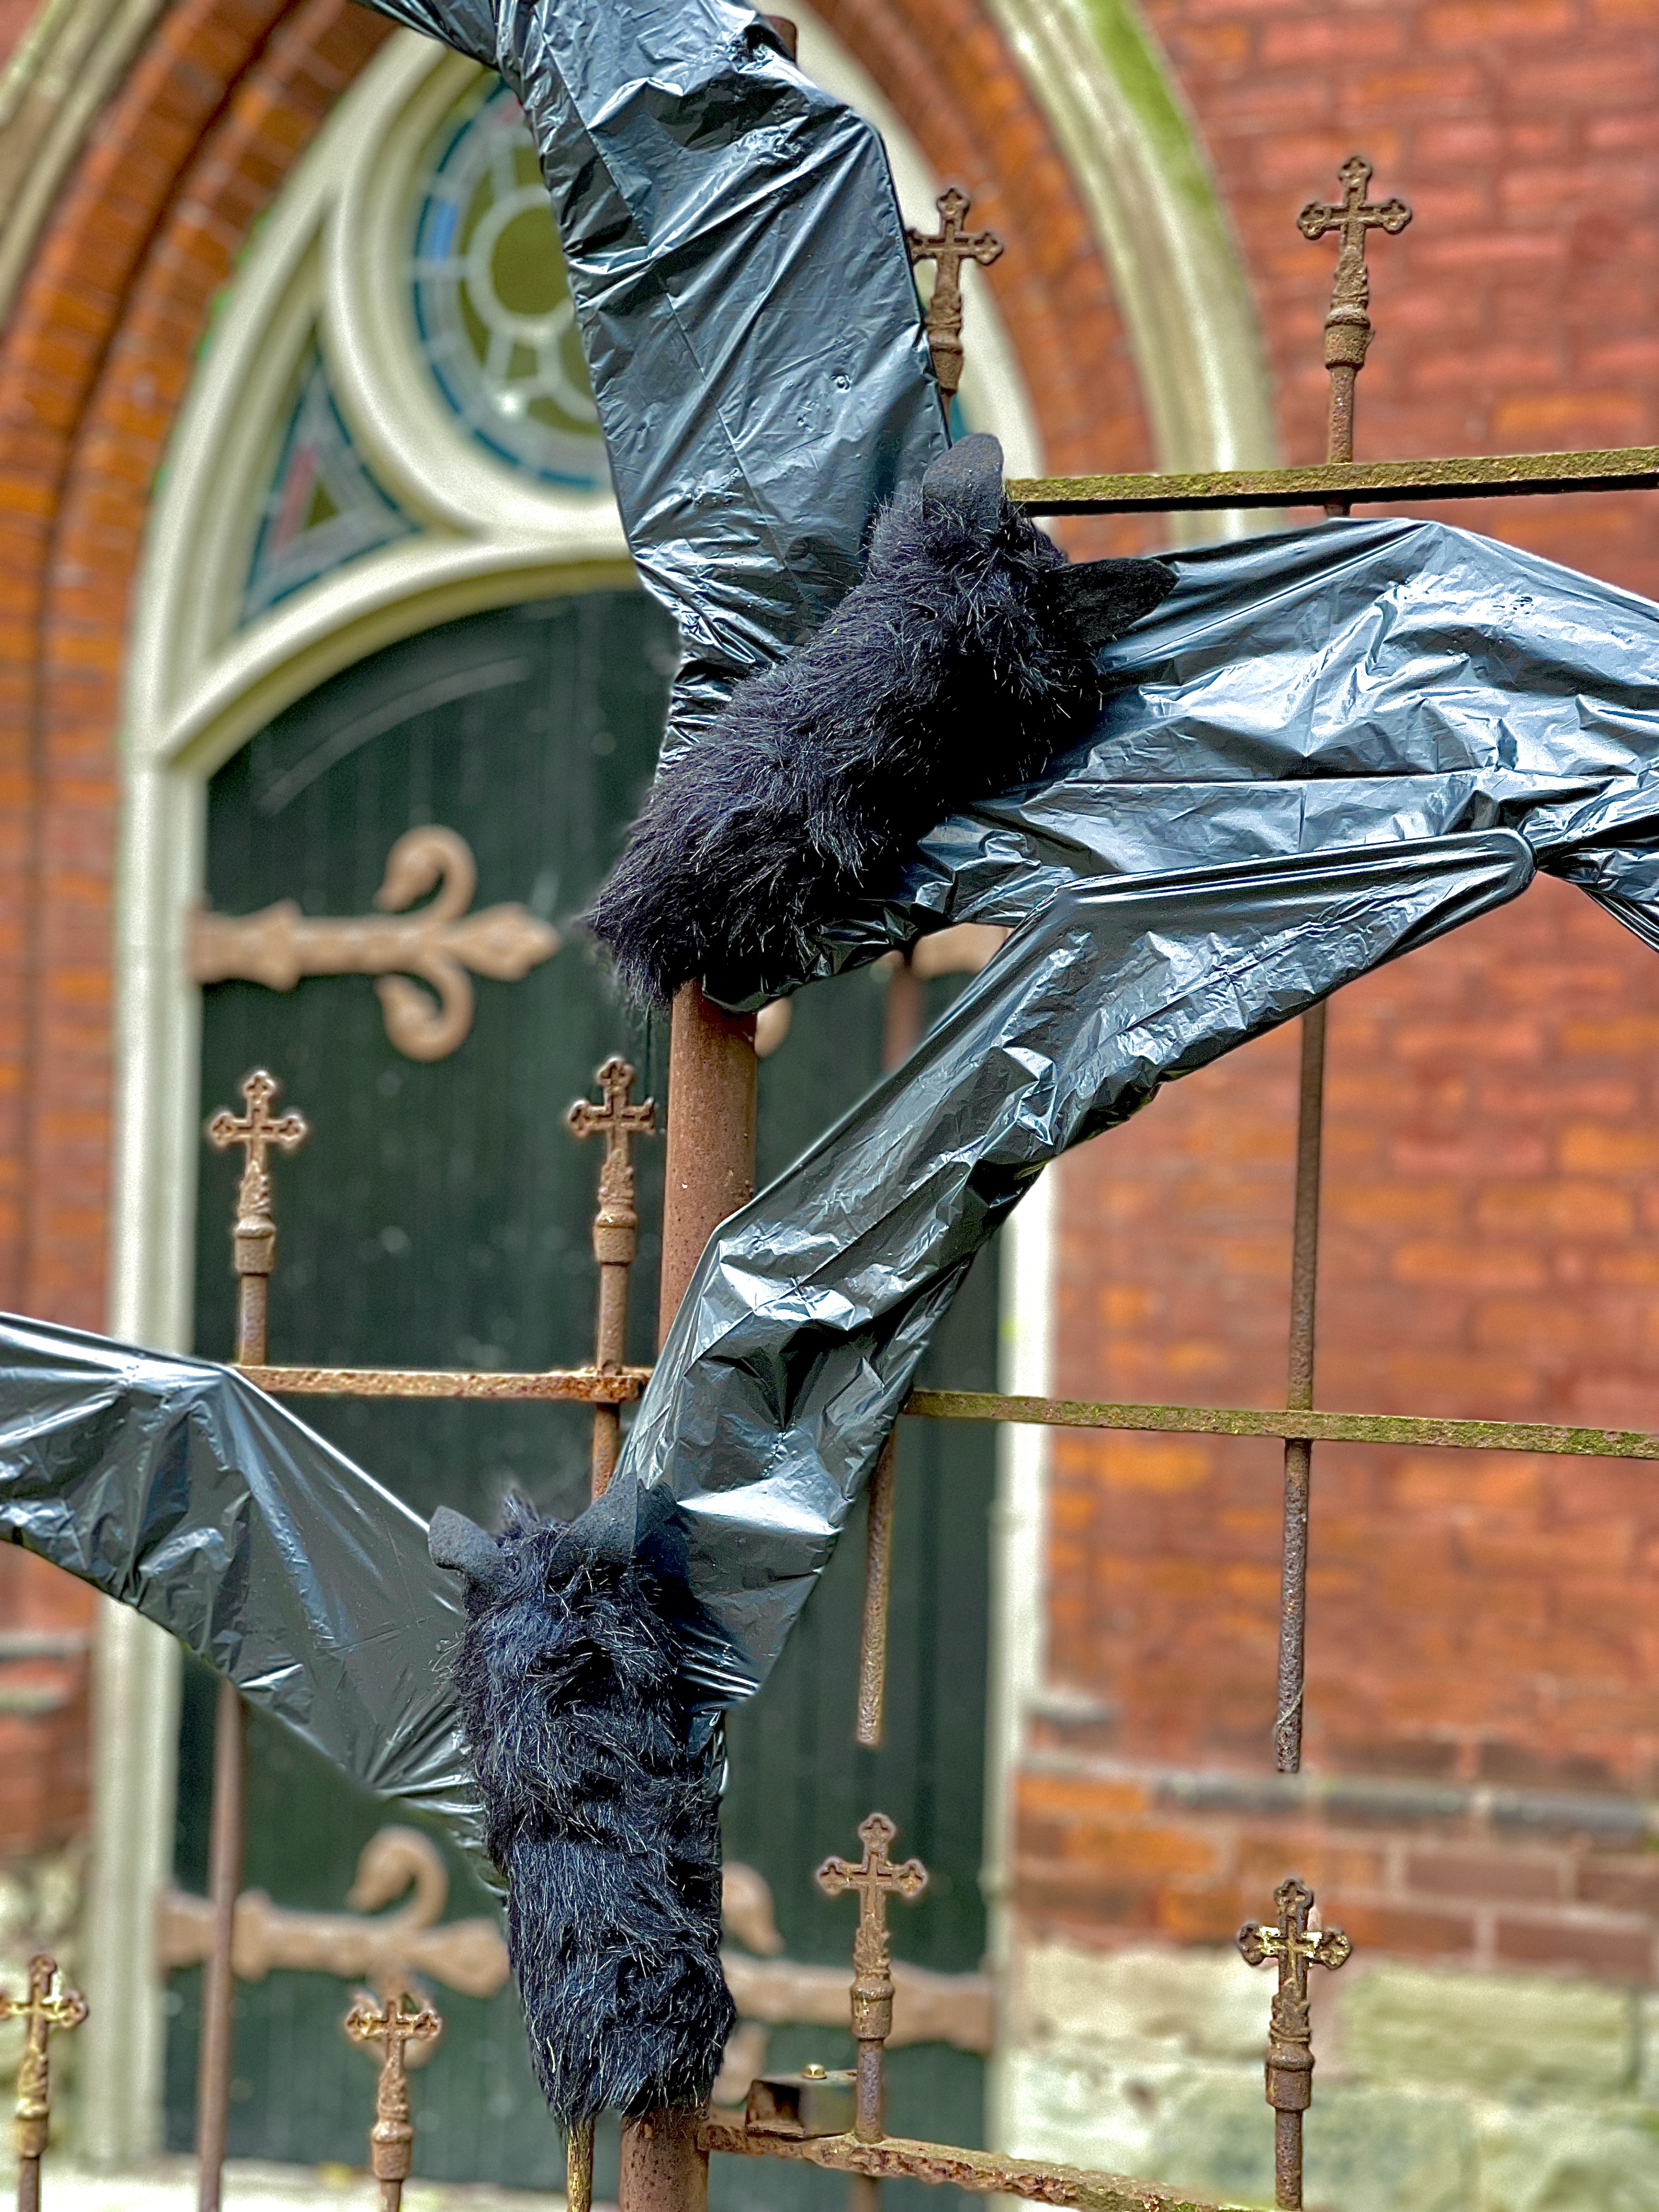
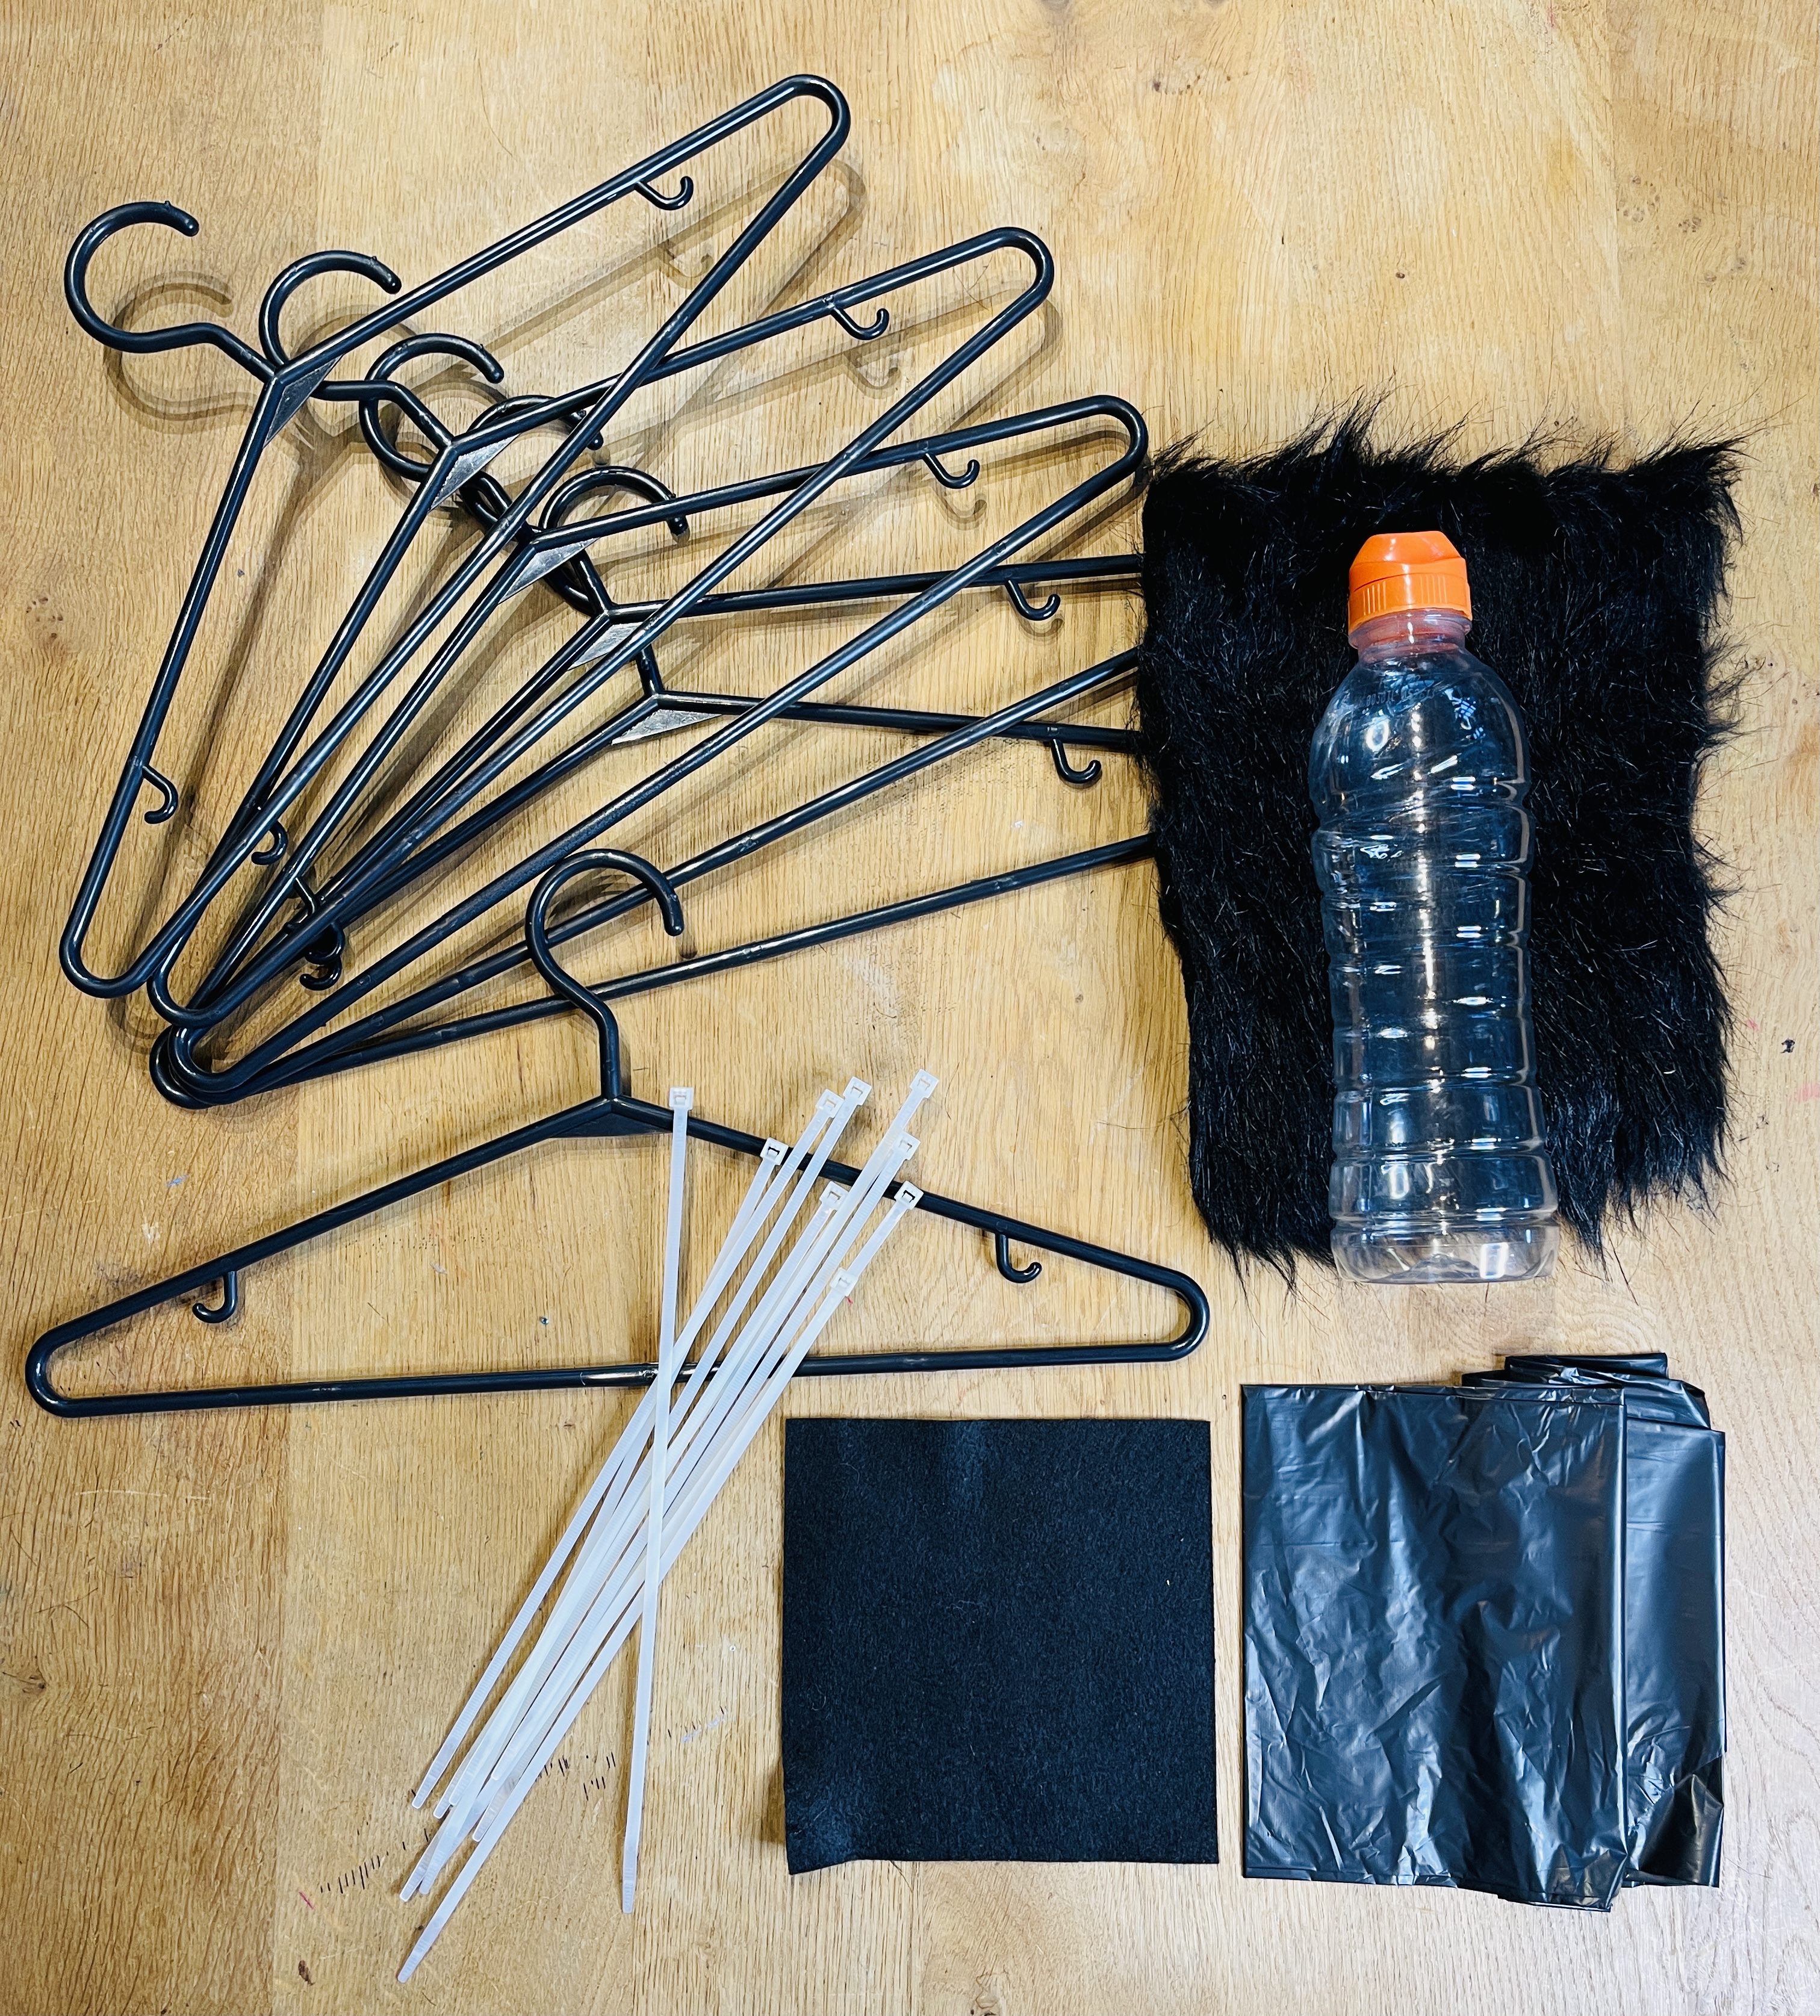
Photo Courtesty: Steven Sabados
Materials needed:
- 6 plastic hangers (for 1 bat)
- Zip ties, black electrical tape/ hockey tape
- Black garbage bags
- Small water bottle
- Faux fur, felt
- Glue gun, thin wire, wire cutters
Steps:
- Remove the hooks from the hangers using wire cutters
- Zip tie the hangers together in the formation as shown. Make two identical ones. If you do not have zip ties, then use black hockey (electrical) tape to secure the hangers.
- Cut the garbage bag in half and use one half per wing. Wrap the bag around the wing and secure on the back using black electrical tape. Remember to match up the other wing before wrapping with the garbage bag.
- Bring the wings together and secure the bottom using zip ties or wire
- Hot glue the faux fur onto the plastic bottle leaving a small amount of bottle visible (on the back). From the felt cut two medium sized bat ears.
- Hot glue two pieces of wire onto the bottle and secure with a small piece of felt to hold it in place.
- Wire the body onto the wings (hangers) and secure in place. Glue the two bat ears to the top of the head.
- Secure a small hook on the back and display indoors or out.