
Recipes by Rachel Pardoe. You can find her on Instagram and YouTube.

Strawberry Basil Buttermilk Scones
| Makes | Prep Time | Cook Time | Total time |
|---|---|---|---|
| 8 scones | 35 minutes | 18-22 minutes | 46-60 minutes |
Special Equipment
Box grater
Ingredients
Homemade buttermilk (see Note)
95g any type of milk (I use 2%)
5g white vinegar
Dough
358g all-purpose flour, divided
90g granulated sugar
20g baking powder
3g fine sea salt
150g frozen unsalted butter
125g diced fresh strawberries
10g chiffonade fresh basil leaves
1 medium egg
All of the homemade buttermilk (100g)
125g 100%-hydration sourdough starter (at peak or discard)
3g vanilla extract
Toppings (optional)
Egg (for egg wash)
Turbinado sugar
Directions
Preheat the oven, make the homemade buttermilk, and mix the dough (20-25 minutes active)
- Preheat your oven 400°F (205°C). Prepare a baking sheet by lining it with parchment paper.
- In a medium bowl, mix together the milk and vinegar. Let it sit for 5 to 10 minutes to allow it to curdle. Set aside.
- In a large bowl, whisk together 340g flour, sugar, baking powder, and salt.
- Use a box grater to grate the frozen butter. Add the frozen, grated butter to the flour mixture and combine with your fingers.
- In a small bowl, toss together the diced fresh strawberries and the remaining 18g flour.
- Add the strawberries and the basil to the flour/butter mixture and toss until evenly mixed.
- In a medium bowl, whisk together the egg, homemade buttermilk, starter, and vanilla extract until cohesive and no lumps from the starter remain.
- Add the wet ingredients to the dry ingredients and stir together with a fork until just combined and everything appears moistened.
Shape the scones (5 minutes active)
- Turn the dough out onto a lightly floured work surface and gently work it into a ball. Press the ball into a 1-inch (2.5cm) thick disc.
- Using a sharp knife or bench scraper, cut the disc into 8 evenly sized wedges.
- Evenly distribute the wedges on the baking sheet.
- If desired, whisk the egg in a small bowl and brush the wedges with the egg wash. Sprinkle the wedges with the turbinado sugar, if desired.
Bake and store (18–22 minutes)
- Bake for 18 to 22 minutes or until the edges of the tops of the scones are golden brown.
- Cool on a wire rack for a few minutes before serving.
- Store the scones in an airtight container at room temperature for 3 days or freeze up to 2 months in an airtight container or freezer bag.
Note:
If you have buttermilk on hand, you are welcome to use that. However, most homes likely do not have buttermilk, so I have included the simple recipe to make your own!
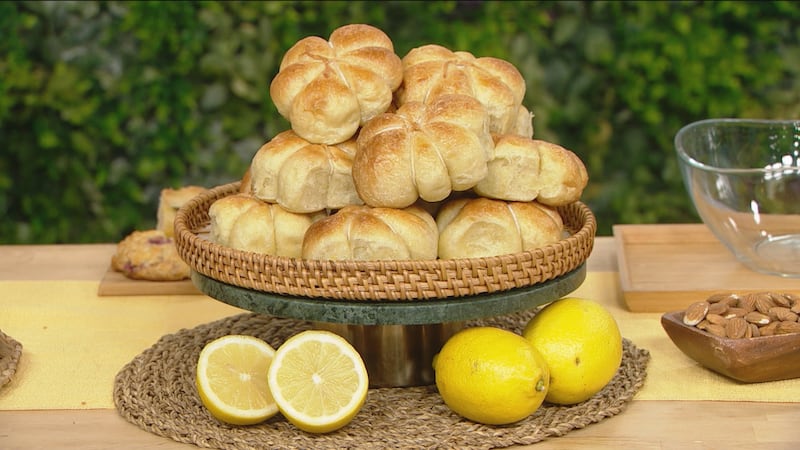
Lemon Cardamom Buns
| Makes | Prep Time | Cook Time | Total time |
|---|---|---|---|
| 16 buns | 1 hour 15 minutes | 16-20 minutes | 42 hours |
Special Equipment
Stand mixer fitted with a dough hook (optional)
Ingredients
Sweet, stiff starter
50g unfed 100%-hydration
sourdough starter
66g tap water
20g granulated sugar
120g all-purpose flour
Dough
160g tap water
160g any type of milk
(I use 2%)
All of the sweet stiff starter
115g granulated sugar
3 medium eggs, divided
8g sea salt
600g bread flour
Zest from 3 lemons
4g ground cardamom
100g unsalted butter,
Softened
Topping
Poppy seeds (optional)
Directions
Prepare the sweet stiff starter (5 minutes, 12 hours rise)
1. Prepare the sweet stiff starter the night before making the dough by mixing all
starter ingredients together in a 1-liter (34fl oz) container. Cover the starter with
plastic wrap and let it rise until at peak or has just started to fall, at least 12 hours.
Make and proof the dough (30 minutes active, 4–8 hours bulk proof at room
temperature, overnight cold proof)
1. The next morning, in a medium bowl or the bowl of a stand mixer, combine the
water, milk, starter, sugar, 2 eggs, salt, flour, lemon zest, and ground cardamom.
Mix on low for 10 minutes. Alternatively, knead by hand for 15 minutes until the
ingredients are fully incorporated.
2. Gradually add the butter to the dough, 1 to 2 tablespoons at a time, and knead
until the butter is fully incorporated after each addition. Knead by hand or in
the stand mixer for 10 minutes until the dough is smooth and elastic. Cover the
dough with a bowl cover or plastic wrap and let it rest for 1 hour.
3. (Optional step for gluten development for a more shreddable crumb. If you wish
to skip this step, proceed to step 4.) Once 1 hour has elapsed, perform a coil
fold (p. 35). Perform two more coil folds in 30-minute intervals.
4. Cover the dough with a bowl cover or plastic wrap and allow the dough to
proof at room temperature until it has doubled in volume. (This may take 4 to 8
hours depending on the ambient room temperature.) Place the covered dough
in the refrigerator for an overnight cold proof.
Shape and final proof (40 minutes active, 4–6 hours final proof)
1. The next morning, line two baking sheets with parchment paper.
2. Use a bench scraper to divide the cold dough into sixteen equal-size portions.
Gently shape each portion into a round bun, dusting with additional flour if
needed to avoid sticking. Optionally, you can tie these loosely with 3 strands of
butcher’s twine to create a pumpkin shape.
3. Arrange the shaped buns on the baking sheets, leaving space for expansion.
Cover with a tea towel and proof at room temperature until doubled in size,
puffy, and a finger-poke test reveals a slow return of the dough. (This may take
4 to 6 hours depending on the ambient room temperature.)
Bake and store the buns (16–20 minutes)
1. Preheat the oven to 375°F (190°C).
2. Whisk the remaining egg in a small bowl. Use a pastry brush to brush the buns
with the egg wash, then sprinkle the poppy seeds (if using) over the tops of
the buns.
3. Bake for 16 to 20 minutes or until the buns are golden brown and their internal
temperature reaches 195°F (91°C). Cool the buns on a wire rack.
4. Store at room temperature in a resealable bag for up to 3 days or in an airtight
container or freezer bag for up to 2 months.
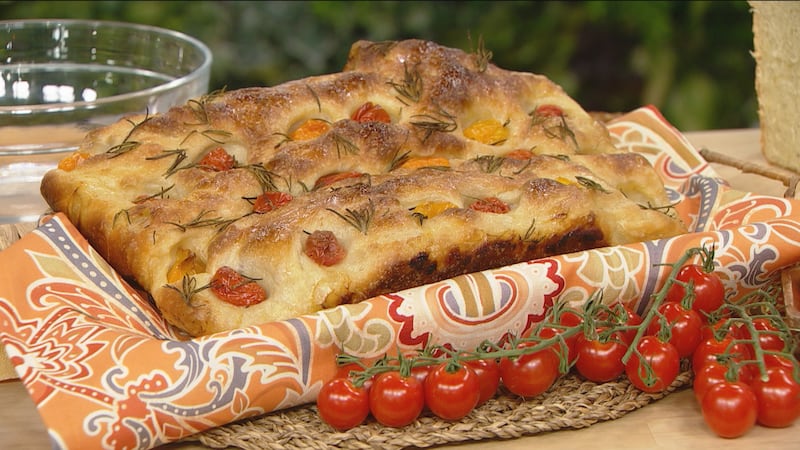
Tomato-Rosemary Focaccia
| Makes | Prep Time | Cook Time | Total time |
|---|---|---|---|
| 1 focaccia | 40 minutes | 25-35 minutes | 36 hours |
Special Equipment
One 9 × 13 × 2-inch (23 × 33 × 5cm) baking sheet
Ingredients
Dough
400g tap water (375g if
using all-purpose flour)
150g active 100%-hydration
sourdough starter
25g honey
25g extra-virgin olive oil
(plus more for drizzling
and coating the pan)
10g sea salt
500g white bread flour
(see Notes)
Toppings
Chopped fresh rosemary
Cherry tomatoes
Directions
Make and proof the dough (25 minutes active, 3–4 hours rest, 6–19 hours cold proof)
- In a medium mixing bowl, combine the water, starter, honey, olive oil, salt, and
flour. Mix by hand or with a dough whisk until fully incorporated. Cover with a
bowl cover or plastic wrap and let rest for 45 minutes.
- Perform a coil fold (p. 35). Cover and let rest for another 30 to 45 minutes.
- Perform three to four coil folds in intervals of 45 minutes, covering the dough
between folds.
- Transfer the dough to the refrigerator and let it chill for at least for 6 hours and
up to 19 hours.
Shape and final proof (5 minutes active, 6–10 hours final proof)
1. Line the baking sheet with parchment paper and generously coat it with
15 to 20 grams of olive oil.
2. Remove the dough from the refrigerator. Using a coil-fold technique, slide
your fingers under the dough and transfer the dough to the prepared pan.
Cover the dough with plastic wrap and let it proof at room temperature until it
has at least doubled in size, appears airy, and jiggles when the pan is gently
shaken from side to side. (This may take 6 to 10 hours depending on the
ambient room temperature.)
Bake and store the focaccia (25–35 minutes)
1. Preheat your oven to 435°F (225°C).
2. Drizzle olive oil over the surface of the dough. Use your fingers to press dimples
into the dough all the way to the bottom of the pan. Insert fresh rosemary and
whole cherry tomatoes into the dimples.
3. Bake for 25 to 35 minutes or until the internal temperature reaches 195°F (91°C).
4. Remove the focaccia from the oven and the sheet/parchment paper, and place
it directly on a cooling rack. (Removing it from the pan and parchment paper
ensures the bottom will remain crispy.) Let it cool for at least 45 minutes
before slicing.
5. Store at room temperature in a resealable bag for up to 3 days or freeze in an
airtight container or freezer bag for up to 2 months.
Notes:
Be sure to use a high-protein bread flour (>12.5% protein content), as this will ensure
the flour is able to fully absorb all the water without the dough becoming soupy. If
you are only able to find all-purpose flour, reduce the water content to 375 grams.
I typically mix the dough in the morning and complete all folds by around 1 p.m.,
then put the dough in the refrigerator until about 10 p.m. I then pull the dough out,
transfer it to the baking sheet, cover it with plastic wrap, and let it proof at room
temperature overnight. It is usually fully proofed by the morning, making it perfect
for breakfast or brunch!
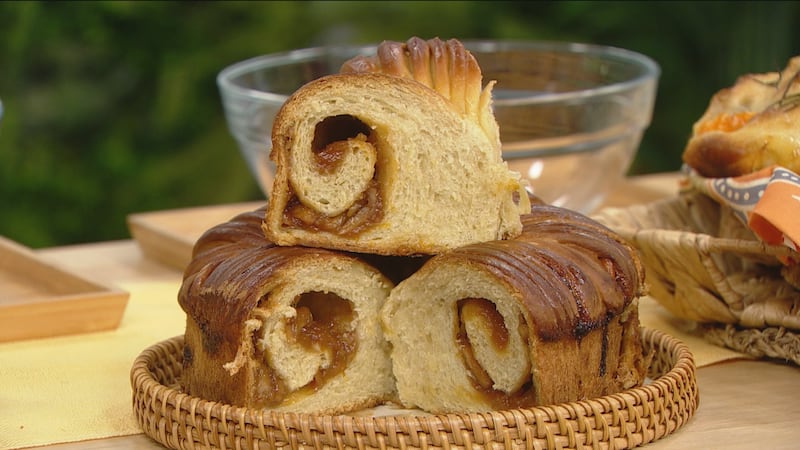
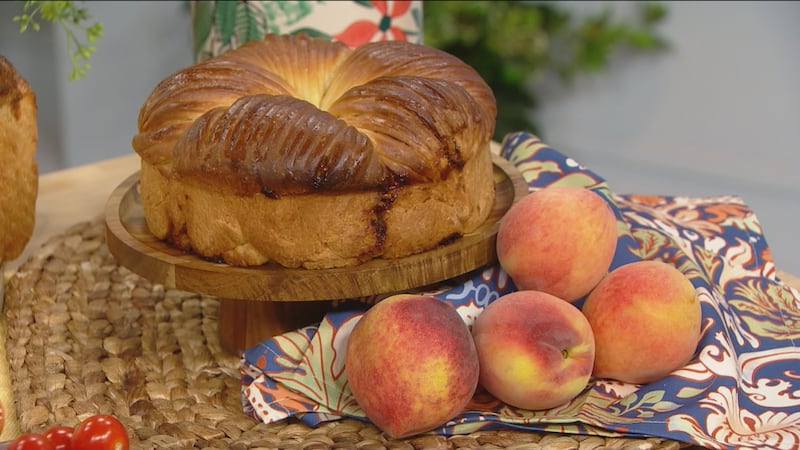
Peach Butter and Candied Almond Wool Roll
| Makes | Prep Time | Cook Time | Total time |
|---|---|---|---|
| 1 wool roll loaf | 1 hour 15 minutes | 45-60 minutes | 36 hours |
Special Equipment
Stand mixer fitted with dough hook (optional)
8-inch (20cm) diameter by 3-inch (7.5cm) tall cake tin or bundt pan
Ingredients
Dough
75g any type of milk (I use 2%)
190g active 100%-hydration sourdough starter
50g granulated sugar
3 medium eggs, divided
7g fine sea salt
370g strong white bread flour
120g unsalted butter (softened)
Peach butter
1200g peeled and sliced fresh peaches
140g granulated sugar
90g light brown sugar
1g salt
2g ground cinnamon
57 apple cider vinegar
Candied almonds
75g sliced almonds
38g light brown sugar
10g unsalted butter
Directions
Make and proof the dough (40 minutes active, 4–10 hours bulk proof at room temperature, overnight cold proof)
- In a medium bowl or the bowl of a stand mixer, combine the milk, starter, sugar, 2 eggs, salt, and flour. Knead on low for 10 minutes. Alternatively, you can knead by hand for 15 minutes.
- Gradually add the butter to the dough, 1 to 2 tablespoons at a time, kneading until the butter is fully incorporated after each addition. Knead by hand or in the stand mixer for 20 to 30 minutes until the dough is smooth and elastic.
- Cover the dough with a bowl cover or plastic wrap and let the dough bulk proof until it has doubled in volume. (This may take 4 to 10 hours depending on ambient room temperature.) Place the covered bowl in the refrigerator for an overnight cold proof.
Make the peach butter and candied almonds (15 minutes active)
- While the dough is proofing, make the peach butter by combining all ingredients in a medium saucepan. Cook uncovered over medium heat until bubbling, then reduce the heat to low and cook for 1.5 hours, stirring occasionally with a rubber spatula. (The peach butter should be thick and deep brown color.) Transfer the peach butter to a bowl, cover, and refrigerate until dough shaping.
- Make the candied almonds by adding all the ingredients to nonstick pan placed over medium heat. Stirring constantly, heat until the sugar is bubbling, ensuring the sugar is melted and the nuts are fully coated in the melted sugar, about 3 to 5 minutes. Remove the pan from the heat and transfer the almonds to a sheet of parchment paper to cool. Once cool, transfer the almonds to a covered bowl until dough shaping.
Shape and final proof (20 minutes active, 3–8 hours final proof)
- The next morning, prepare the cake pan by coating it with butter or cooking spray.
- Remove the dough from the fridge and cut into five 181 gram balls. Roll one ball into a 4-inch × 8-inch (10cm × 20cm) rectangle (rounded corners are fine). Using a bench scraper, cut thin strips of dough lengthwise along the top half of the rectangle. Spread the peach butter on the bottom half of the dough and sprinkle with 15g of the almonds.
- Whisk the remaining egg in a small bowl to create the egg wash. Roll the dough, starting from the bottom (short side) to form a log. Place the log around the perimeter of the prepared pan. Prepare the other 4 balls until the perimeter of the pan is lined with dough. Brush the dough with the egg wash. Cover and let the dough rise until airy and jiggly, and a finger poke produces a slow return of the dough. (This may take 3 to 8 hours depending on ambient room temperature).
Bake and store the roll (45–60 minutes)
- Preheat the oven to 350°F (175°C).
- Coat the dough again in egg wash. Bake the dough for 45 to 60 minutes or until the internal temperature reaches 190°F (88°C). Remove the roll from the bundt pan and let it cool on a wire rack for 1 hour before slicing.
- Store the roll at room temperature in an airtight container or resealable bag for up to 3 days or freeze, sliced, in a freezer bag for up to 2 months.