

Recipes from Bilal Bhatti's 'Beyond Measure'

CHICKEN KARAHI
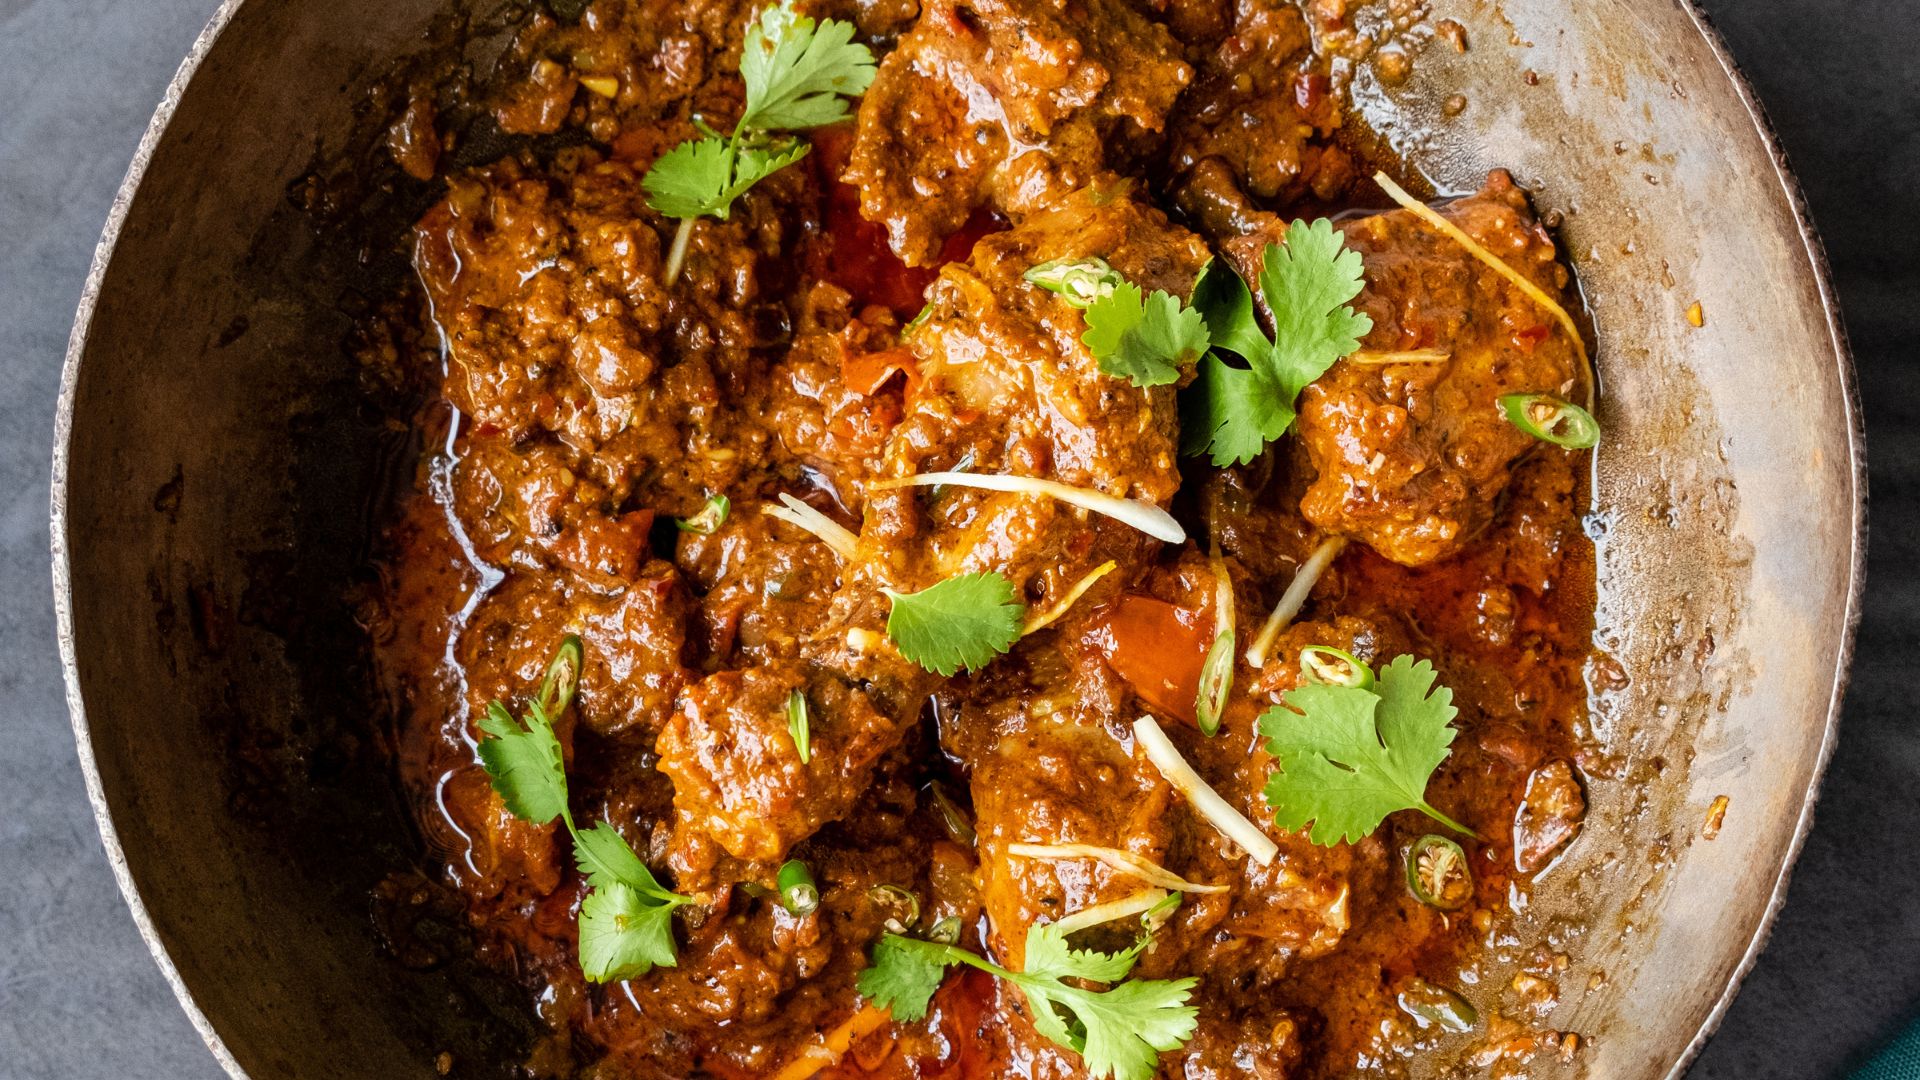
In my experience, chicken karahi is a staple dish in most Pakistani homes and is commonly found on dinner tables a few times a month. For anyone new to Pakistani cuisine, I’d suggest starting with this recipe, a chicken curry of sorts. Karahi refers to a large, deep steel pan that’s similar to a wok. Chefs and cooks use a karahi over high heat and continuously rotate food with heavy steel tongs. For us home cooks, any deep pan or wok works perfectly.
Yield: 4 servings
Prep time: 3 minutes
Cook time: 25 minutes
EQUIPMENT
karahi, wok, or another deep pan
INGREDIENTS
ghee or vegetable oil
4 bone-in chicken thighs and legs, chopped into chunks using a cleaver
2 spoonfuls of salt, or to taste
8 grinds freshly cracked black pepper
2 spoonfuls Ginger, Turmeric, and Garlic Paste
2 large tomato, diced
6 green Thai chili peppers, thinly sliced on bias, for garnish (see Tip)
½ spoonful ground cinnamon
½ spoonful Garam Masala
½ spoonful red pepper flakes
½ spoonful Kashmiri red chili powder
½ spoonful ground clove
3 spoonfuls plain yogurt
splash of heavy cream
chopped cilantro, for garnish
fresh ginger, peeled and thinly sliced, for garnish
Directions:
- Place a large pan over high heat and add enough ghee or oil to shallow fry. Add the chicken pieces to the oil and cook until light brown, about 3 to 5 minutes.
- Season chicken with salt and pepper and then add the Ginger, Turmeric, and Garlic Paste, tomatoes, and Thai peppers (reserving some Thai peppers for topping). Reduce the temperature to medium-high heat, cover the pan, and cook for 10 minutes.
- Add the cinnamon, garam masala, red pepper flakes, chili powder, and clove and then mix well. After a couple of minutes, add yogurt and heavy cream to the pan. Cook for 5 minutes. The end product should be a thin sauce that evenly coats the chicken.
- Plate and garnish with the remaining Thai pepper, cilantro, and ginger. Enjoy with Roti or Garlic Naan.
TIPS
When adding spices to recipes, a general rule is to ensure the main ingredient is completely coated. When gauging the quantity of spices to add, look at your protein and estimate how many pinches or spoonfuls you’ll need—and don’t be afraid to make mistakes. Each time you prepare a recipe, estimating will become easier.
Green Thai chili peppers are spicy! Be cautious with how many you use. Try nibbling one to determine the heat and then add one or more according to your desired taste.
SAAG
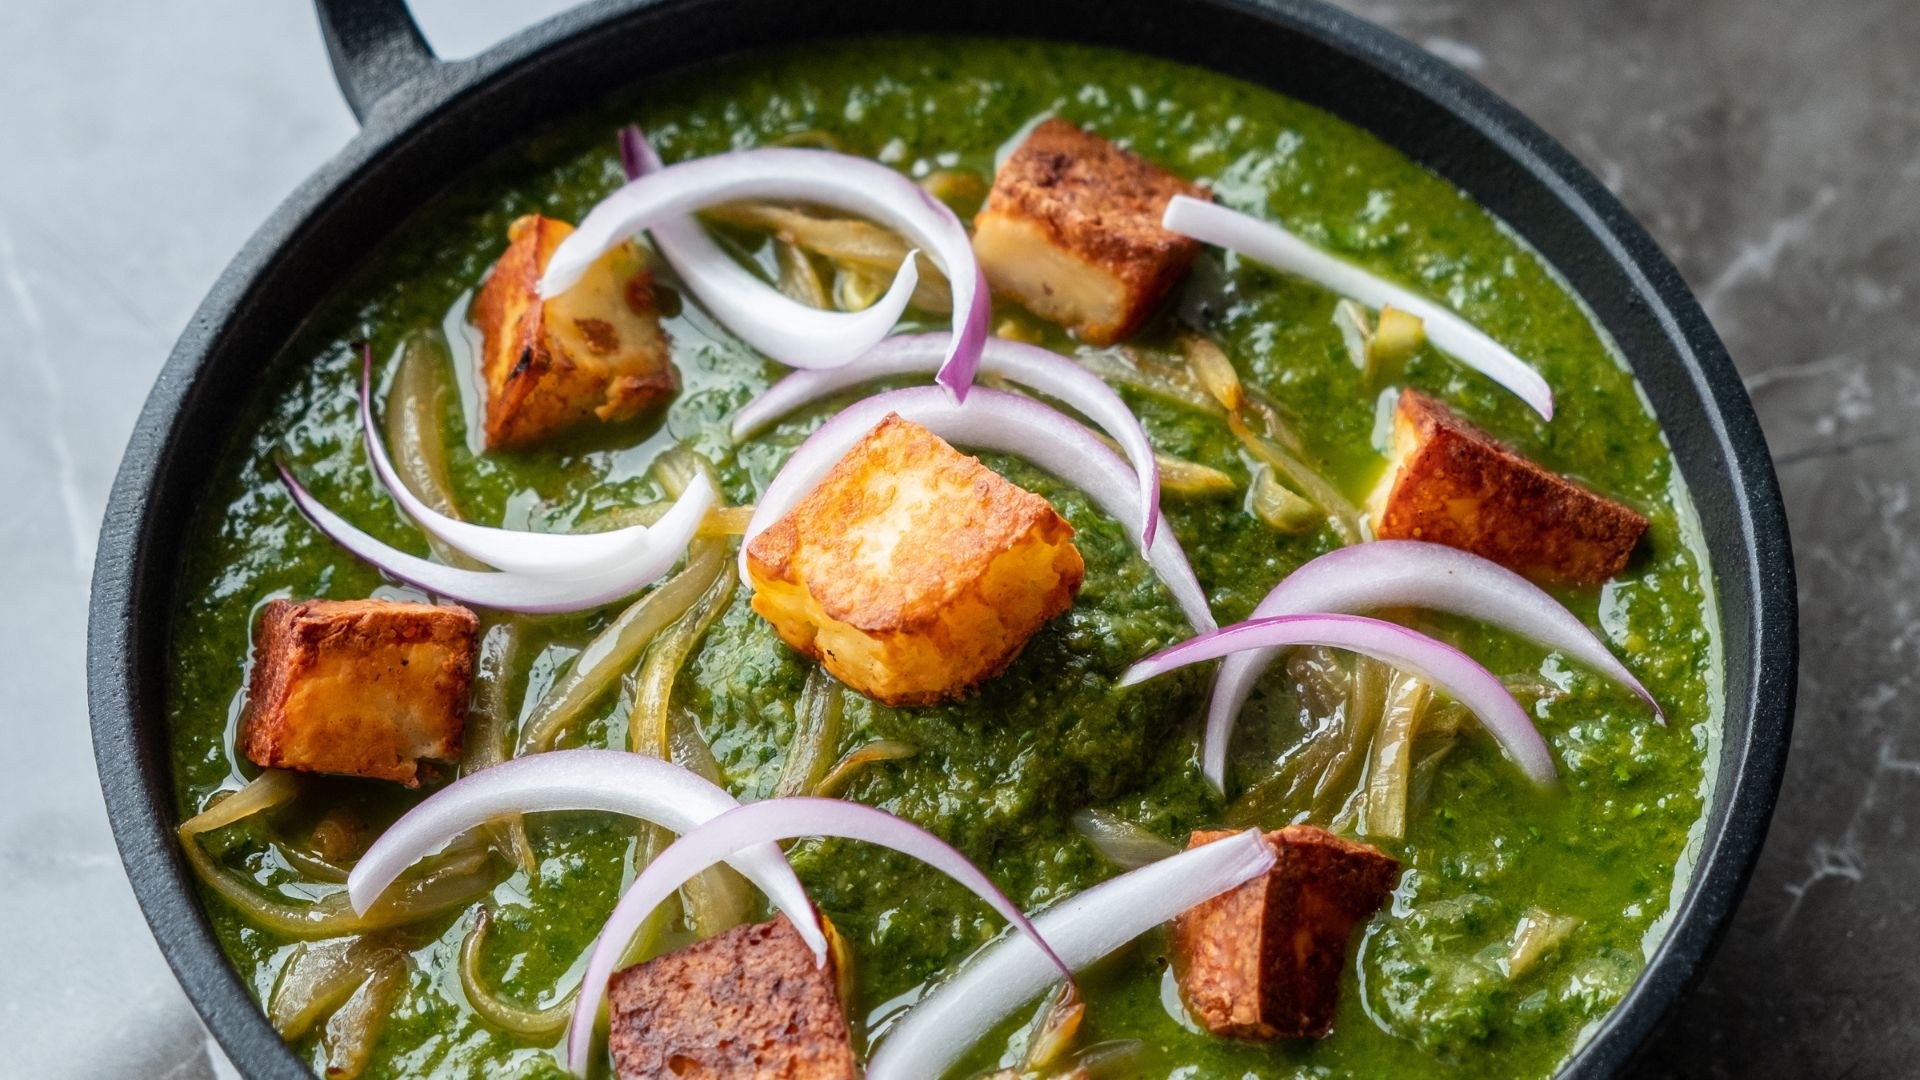
All cultures have their version of slow-cooked greens. These are cooked mustard greens, Pakistani style. Saag is one of those dishes that replaces meat easily for a tasty, filling meal. When I fi rst visited my father’s town of Chakwal, Pakistan, I was blown away with the variety of saag his family fed us. In our home, we rarely ate raw greens; most are slow cooked with a soft texture.
Yield: 4 servings
Prep time: 10 minutes
Cook time: 2 hours on the stove or 45 minutes in a pressure cooker
EQUIPMENT NEEDED
lidded stock pot or pressure cooker
hand blender, optional
INGREDIENTS
12 handfuls mustard greens, roughly chopped
1 heaping spoonful salt, or to taste
1 spoonful chili powder
1 spoonful ground cumin
1 spoonful ground coriander
2 spoonfuls Ginger, Turmeric, and Garlic Paste
green Thai chili peppers, to taste, roughly chopped (see Tips)
4 spoonfuls atta (Atta is wholemeal wheat flour:Not to be confused with “whole wheat” flour. Atta is a blend generally consisting of durum flour, wheat, bran, and wheat flour.)
1 large onion, thinly sliced spoonful of mustard oil
pinch of cumin seeds
1 handful paneer, cubed, for garnish
handful raw red onion slices, for garnish
Directions:
- In a large pot, add the mustard greens, salt, chili powder, ground cumin and coriander, Ginger, Turmeric, and Garlic Paste, and the green Thai chili peppers and enough water to fully cover ingredients. Bring to a simmer over medium-low heat, stirring every 20 minutes, until the liquid has evaporated, about 2 hours. If using a pressure cooker, about 45 minutes.
- Add the flour and, using a large spoon or masher, mash the greens to achieve a smoother consistency. Alternatively, you can use a hand blender and pulse until a thick consistency is achieved.
- Warm a large sauté pan over medium heat. Add the mustard oil and onions and cook, stirring often, until caramelized and golden brown, about 5 minutes. Add the cumin seeds and continue cooking until aromatic, about 2 minutes. Remove from the pan and set aside.
- In the same pan add more oil and cubed paneer and sear on all sides until golden brown, about 30 seconds per side. Transfer to a plate and set aside.
- To serve, place saag in a deep dish and garnish with pieces of paneer (if desired) and onions and enjoy with Roti or Paratha.
TIP
Paneer is optional and can be removed or even replaced with tofu to make it vegan.
MAKE IT YOUR OWN
There are many different types of saag, feel free to switch up the greens—for example broccoli rabe, kale, or collards.
Green Thai chili peppers are spicy! Be cautious with how many you use. Try nibbling one so you understand what you’re dealing with and add according to your taste.
PANI PURI (AKA GOLGAPPA)

This dish has two names: Pani Puri (meaning water, fried dough) and Golgappa. It’s one of the most popular snacks throughout Pakistan. When I’m in Pakistan I regularly see street vendors with carts full of prepared puris and bright spotlights shining down on them—at night the lights almost look like beautiful little lanterns. Filled with spicy and tangy toppings, Pani Puri is the ultimate one-biter. Think of it as a nacho with all the toppings, in one perfectly balanced chip. They are addicting, sorry not sorry.
Yield: 4 servings (makes 8 pani puri)
Prep time: 35 minutes
Cook time: 2 minutes
EQUIPMENT
rolling pin
small, round cookie cutter or small-rimmed glass
PURI
½ saucer semolina flour
1 heaping spoonful all-purpose flour
pinch of salt
½ spoonful baking soda
vegetable oil, for deep frying, plus extra for greasing the
rolling pin
PANI
½ spoonful ground cumin
½ spoonful Chaat Masala
½ spoonful mango powder
pinch of ajwain (carom seeds)
pinch of black salt
1 spoonful dried mint
pinch of salt
2 spoonfuls Imlee Chutney (recipe below)
FILLINGS
handful of chickpeas (canned or soaked and cooked, if dried)
handful of boondi (fried chickpea balls, they can be found at your local Pakistani or Indian market)
plain yogurt
Directions:
PURI
- In a medium mixing bowl, combine the puri ingredients. Fill a small jug or pitcher with water. Continue mixing the dough, while periodically adding splashes of water as needed, just until the dough comes together. Knead the dough into a ball. The end product should be quite dense, and similar in texture to modeling clay.
- Cover the bowl with a clean kitchen towel and set aside to rest at room temperature for 20 minutes.
- Fill a large pot about 1⁄3 of the way up the sides with vegetable oil and set it over medium-high heat.
- Using an oiled rolling pin, roll out the dough until it’s thin enough to see through.
- Using a small, round cookie cutter or a small-rimmed glass, cut out 8 circles from the dough.
- One at a time, carefully transfer a dough circle to the heated oil and press down with tongs or a slotted spoon, which will allow the puri to puff into a ball. Flip the puri, and cook until golden brown on both sides, about 20 seconds total (see Tips).
- Remove the puri from the oil and place on a paper towel to remove excess oil.
- Repeat steps 6 and 7 to fry the remaining puris.
PANI
- Add the pani ingredients into a medium bowl and mix with water. The consistency should be water thin. Taste for seasoning and tanginess and adjust as necessary.
ASSEMBLY
- With your finger, lightly poke a hole through the top of a puri, and carefully crack of bits of the puri to create a hole just large enough to fill it with toppings. You’re essentially creating a little bowl, but it should be able to hold the watery puri mixture.
- Add a few chickpeas, a pinch of boondi, a dollop of yogurt, and a couple spoonfuls of the pani mixture.
- Immediately consume!
- Fill the remaining puris as you’re ready to consume them, or else they’ll get soggy.
TIPS
Many times we would simply buy the puri (fried hollow dough balls) at our local Pakistani supermarket. Feel free to skip the process of making it at home and save some time!
The first puri should be a test run; adjust the time and temperature accordingly.
To test if the cooking oil is ready, you may either carefully drop a small piece of flattened dough into it and see if the dough bubbles or dip a wooden spoon or chopstick and see if small bubbles form around it. If so, the oil is ready.
MAKE IT YOUR OWN
Many people have slightly different variations of what they like to fill their pani puri with, but this is how we grew up eating it. Try adding pieces of boiled potatoes or some cilantro if you like.
IMLEE CHUTNEY
I think this chutney may be the only time I eat imlee, also known as tamarind. I don’t use imlee often, but it makes one hell of a great chutney. Imlee Chutney is on the sweeter side and pairs well with most dishes.
Yield: 4–6 servings, as a condiment
Prep time: 5 to 10 minutes
Cook time: None
INGREDIENTS
2 large spoonfuls of tamarind paste
1 small spoonful of jiggery
pinch of chili powder
pinch of ground cumin
pinch of ground coriander
pinch of salt
Directions:
- In a small saucepan over high heat, add the tamarind paste and enough water to submerge the paste completely. Bring the mixture to a boil and then reduce the heat to medium-low and keep at a simmer. Continue cooking the until mixture is thick, but still able to fall off the back of a spoon.
- Strain the mixture through a fine-mesh strainer into a small bowl and be sure to scrape the remaining tamarind from the bottom of the strainer.
- Transfer the strained tamarind into a saucepan and warm over low heat. Add the jaggery, chili powder, ground cumin, ground coriander, and salt to the tamarind sauce and mix well to combine. Cook until mixture is aromatic and warm, about 5 minutes.
- Serve immediately or transfer to an airtight container and refrigerate for up to 3 days.
TIP
This chutney freezes well. Store in an airtight container for up to 3 months
RASMALAI
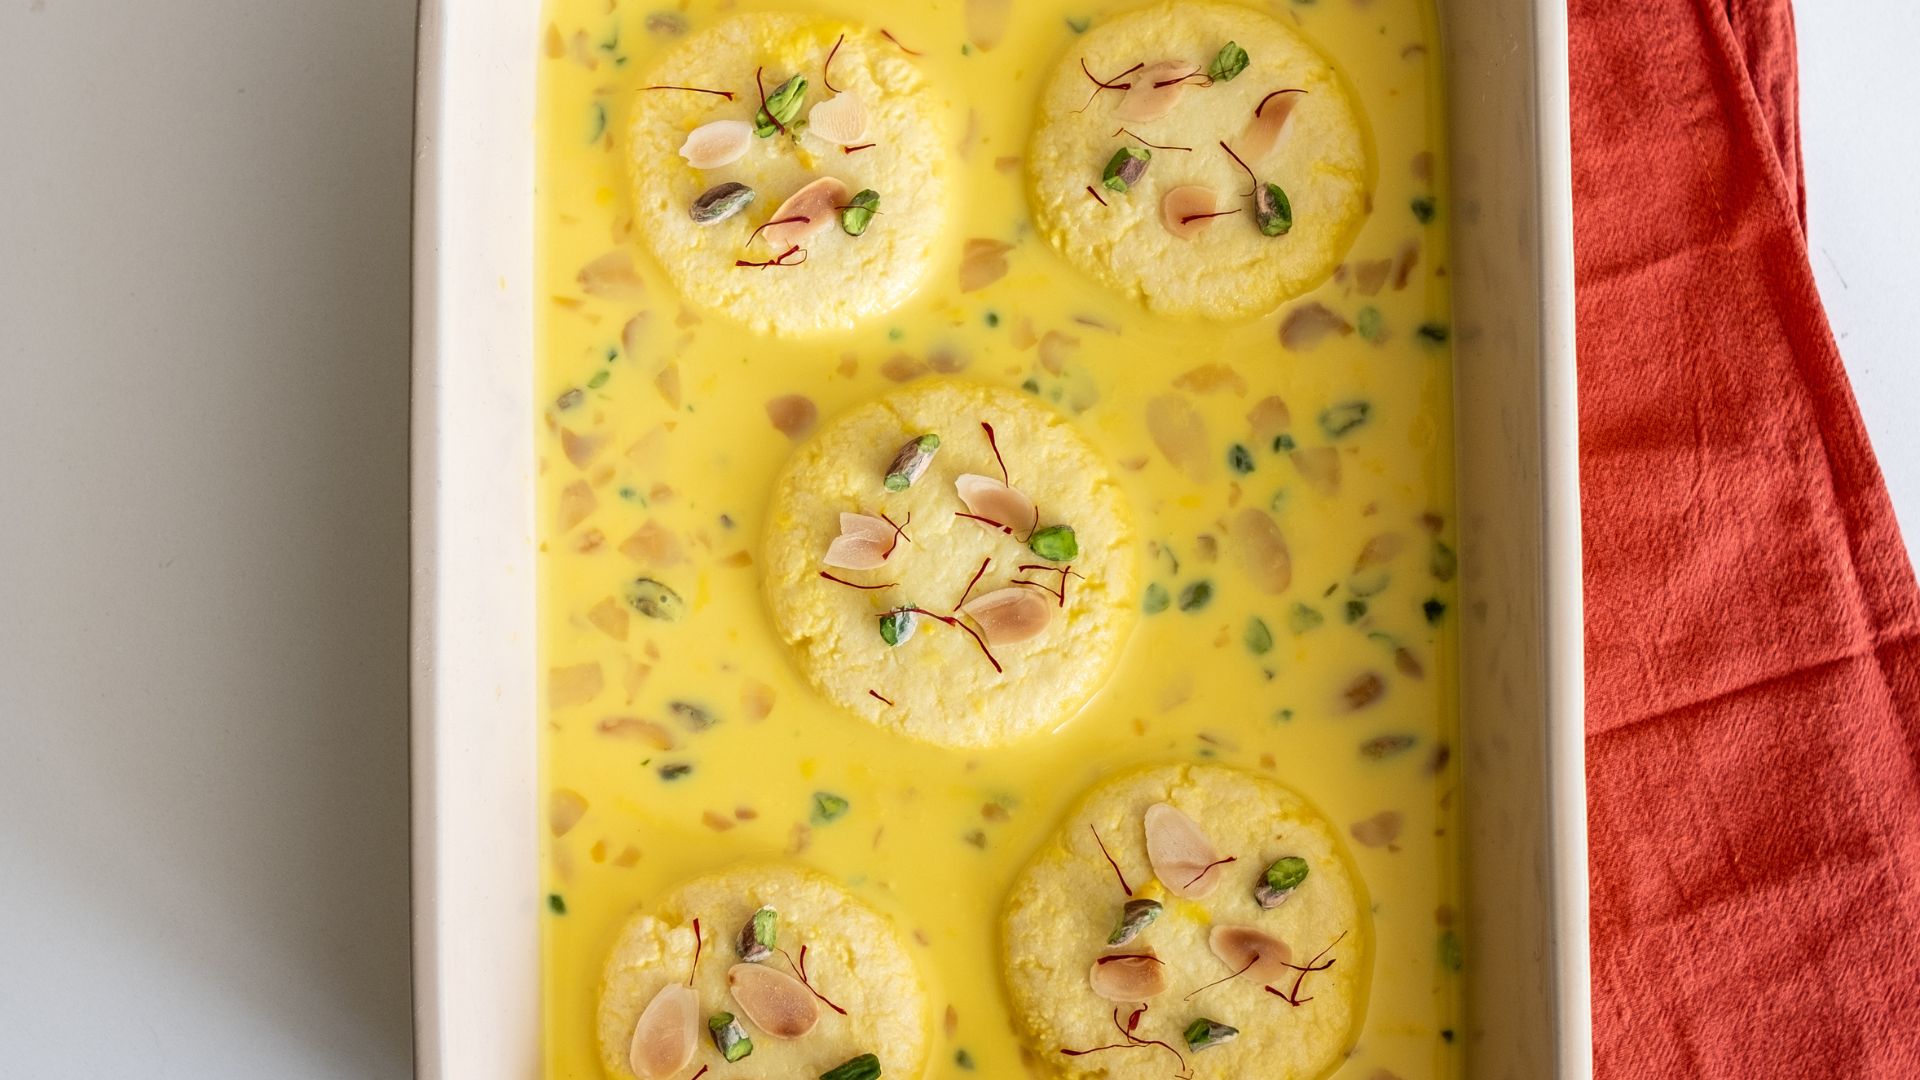
You might think kulfi is my favorite dessert, and it’s defi nitely up there. But if I had to choose one, it’s Rasmalai. Essentially a sweet cottage cheese, Rasmalai has a great spongy and squishy texture. It also doesn’t have to be made overly sweet—which is great for our community since many of the aunties in my life are struggling with diabetes. It’s a great skill to be able to make the desserts you love at home because you can adjust the sugar so everyone can enjoy them.
Yield: 4–6 rasmalai
Prep time: 10 minutes
Cook time: 90 minutes, plus 60 minutes resting time
EQUIPMENT
Cheesecloth
INGREDIENTS
spoonful of granulated sugar, plus more for syrup
small handful of almonds, roughly chopped, plus extra for garnish
small handful of pistachios, roughly chopped, plus extra for garnish
2 pinches of cardamom pods, lightly crushed, divided
1 pinch of saffron, plus extra for garnish
1 gallon whole milk (the fatter the better)
squeeze of fresh lemon juice, plus more for syrup
Directions:
- In a medium saucepan, add a spoonful of sugar, almonds, pistachios, 1 pinch of cardamom pods, and saffron, and then add half the milk. Place the pan over medium heat and stirring constantly, reduce the mixture by one third, about 30 minutes. Check sweetness level, adjust flavors as desired, and then remove the pan from the heat. Transfer to a container and chill in the fridge until ready to use.
- In another pan, add the remaining milk along with a squeeze of lemon juice and slowly mix it in, letting it curdle the milk and create curds. If you don’t see any curds forming in the first few minutes, you may need to add a bit more lemon juice. The curdling process may take up to 30 minutes to complete.
- Once the curds have formed, immediately pour the mixture through cheesecloth, straining the liquid from the solids. Gently rinse the solids in the cheesecloth with running water to get rid of the lemon flavor. Don’t squeeze too hard. Discard the liquid.
- Tie the cheesecloth with the curds onto your sink faucet (so it can drain over your sink) and let the curds drain and rest at room temperature for about 15 minutes.
- Transfer the curds from the cheesecloth to a medium mixing bowl and knead the curds into a smooth ball. Break the curd ball into smaller golf ball–size pieces and press each ball to form a cheese disc (see Tip).
- In a lidded medium saucepan, add enough sugar to cover the bottom. Add about twice as much water as sugar and then add the remaining cardamom pods and squeeze the lemon juice over the top. Set the pan over medium heat and bring the mixture to a simmer. Keep the sugar water at a gentle simmer and reduce the liquid until a thick syrup is formed, about 5 to 10 minutes. There should be enough syrup to fully submerge the cheese discs.
- Carefully add the discs to simple syrup and cover the pan. Reduce the heat to low, and simmer for 15 minutes or until the discs have swelled. Remove the saucepan from heat and set aside to cool for 15 minutes.
- In a small baking dish, pour the reserved mug of milk mixture from step 1 into the bottom and then carefully place your discs in the dish. The discs should be about two-thirds covered by the milk mixture. Garnish each disc with additional almonds, pistachios, and saffron. Place the baking dish in the fridge and allow the rasmalai to set for at least an hour or as long as overnight.
TIP
When forming the discs, be sure they’re as smooth as possible and that no cracks form. Cracks can cause the cheese to separate when cooked in the syrup.
Photo credits: Photographer Igor Aldomar and the studio is Monogram Design Centre.


