CTV Recipes
Search Recipes
Creamsicle cake


This cake recipe is inspired by your favourite childhood iced treat. Orange and vanilla are the key flavours in this layer cake, which is also orange-coloured. The cake is moist and not the least bit crumbly, and the cream cheese frosting handles easily and sets well, making this cake a manageable task for anyone new at assembling cakes (or for a family project with kids). It’s perfectly served right from the fridge and stable enough to transport to a party.
YIELDS
TO
Ingredients
- 3 cups (390 g) cake & pastry flour
- 1 3/4 cups (350 g) granulated sugar
- 2 1/2 teaspoons baking powder
- 1/2 teaspoon fine salt
- Zest of 2 navel oranges
- 1/2 cup (115 g) unsalted butter, at room temperature and cut into pieces
- 4 large eggs, at room temperature
- 3/4 cup (175 ml) fresh orange juice
- 3/4 cup (175 ml) buttermilk
- 1/2 cup (125 ml) vegetable oil
- 1 tablespoon (15 ml) vanilla extract
- 1 teaspoon orange extract
- Orange food colouring gel, powder or paste (optional)
- 2 (8 oz/250 g) pkg cream cheese, softened
- 1 cup (225 g) unsalted butter, at room temperature
- 6 to 6 1/2 cups (780 to 845 g) icing sugar, divided
- 2 teaspoons vanilla extract
- 2 teaspoons orange extract
- Orange food colouring gel, powder or paste
Directions
- Preheat the oven to 350° F (180°c). Lightly grease and line the bottoms of three eight-inch (20 cm) round cake pans. Dust the sides of the pans with flour, tapping out any excess.
- Sift the flour, sugar, baking powder and salt into a large bowl or the bowl of a stand mixer fitted with the paddle attachment. Add the orange zest and stir to combine. Add the butter and mix on medium-low speed until the mixture is crumbly about one minute. TIP: This cake-mixing method is known as the “reverse method.” originally this style of cake was made by beating the butter and sugar, adding the eggs and then alternately adding the flour and liquids. By working the butter into the flour and then adding the liquids and eggs all at once, the process is simpler and the results are more consistent. It saves a few dishes too.
- In a separate bowl, whisk the eggs, orange juice, buttermilk, oil and vanilla and orange extracts together. Add all at once to the flour. If using a stand mixer, switch to the whip attachment (hand beaters will still work fine) and mix first on low speed to combine. Increase the speed to medium and beat for 90 seconds, until the batter is thick and smooth. Add orange food colouring, if using. Divide the batter evenly among the pans. Give each pan a tap on the counter to knock out any air bubbles. TIP: Chilling the assembled cake reduces the intensity of the orange flavour, but adding one teaspoon of natural orange extract helps to bolster it.
- When making a sponge cake, you want to avoid tapping or shaking the pans in order to keep all of the air you worked in by whipping the eggs. This creamsicle cake uses a thicker batter, and air bubbles can inadvertently work their way in when mixing or pouring the batter. Tapping the pans before baking helps to pop out the bubbles. <end/bw>
- Bake the cakes for 30 to 35 minutes, until a skewer inserted in the centre of the cake comes out clean. Cool the cakes in their pans for 20 minutes, then tip them out onto a rack to cool completely.
- Make the frosting. Using electric beaters or a stand mixer fitted with a paddle attachment beat the cream cheese and butter on low speed to combine. Add three cups (390 g) icing sugar and beat on low speed, increasing to medium speed until combined. Stir in the vanilla and orange extracts. Add three cups (390 g) more of the icing sugar, beating at first on low speed and then increasing to medium. Beat for two minutes to build in structure. If the frosting seems too soft, add the remaining half a cup (65 g) of icing sugar and beat for another two minutes. Tint the frosting a pale orange colour. TIP: This recipe makes lots of frosting, in case you want to plan some elaborate piping. Any extra frosting can be frozen in an airtight container for up to three months. Thaw it to room temperature and re-whip it before using.
- Assemble the cake. Place a cake layer onto a cake wheel or platter. Cover the top of the cake generously with frosting and spread it to level it. Set the second cake layer on top and repeat, covering the top of it with frosting. Place the final cake layer on top. Cover the top of the cake with enough frosting to cover the cake in a level layer. Spread frosting on the sides of the cake to cover and fill in any gaps. The cake should not be visible through the frosting. Chill the cake for an hour before decorating.
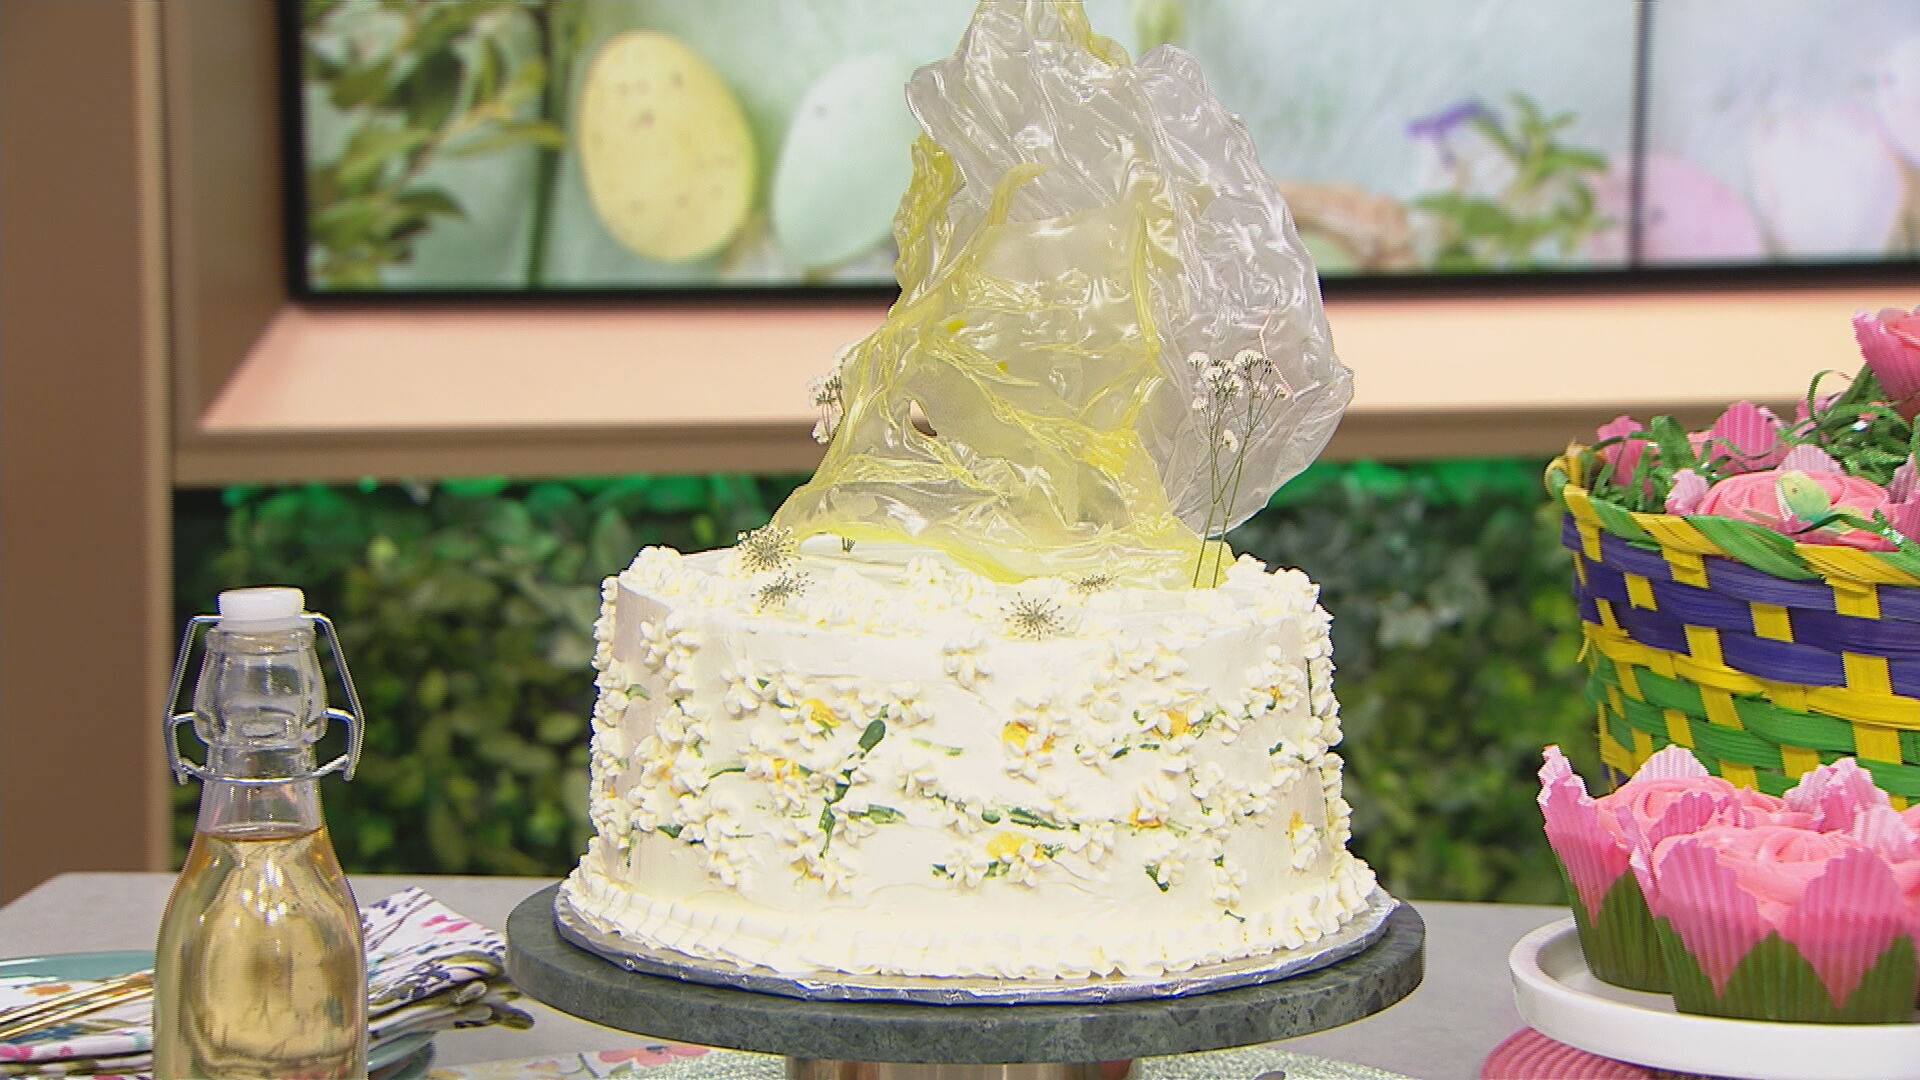
- Decorate the cake. Divide the remaining frosting into three bowls. Leave one as is. Tint one bowl a medium orange and the other a darker orange. Use an offset spatula to smear patches from all three bowls onto the side of the cake, leaving space between these smears. Use the same offset spatula or a cake or bench scraper to spread the frosting into a smooth layer while you spin the cake: blending the coloured patches will give the frosting a watercolour effect. If you wish, pipe any remaining frosting on top of the cake—use a different tip for each colour and create an arc of piped florets on top of the cake. Chill the cake for at least two hours before serving. Enjoy!
TIP: Rice paper “sails” give this cake the appearance of movement. You will need three or four sheets of edible round rice paper (the type used in Vietnamese salad rolls), six or eight sheets of parchment paper and some liquid or paste food colouring. Fill two to three pie plates with warm (not hot) tap water and add a few drops of liquid or paste food colouring to each. Crumple up a few pieces of parchment paper to give them height and structure and set them on baking trays or cooling racks. Submerge a sheet of rice paper in the water until it softens, about 30 seconds. Carefully lift the rice paper from the water and lay it across the crumpled parchment. Repeat with two to three more sheets. Allow the rice paper to air-dry, uncovered, on the counter for 24 hours, then peel away the parchment. Press the sticky “sails” onto the decorated cake.