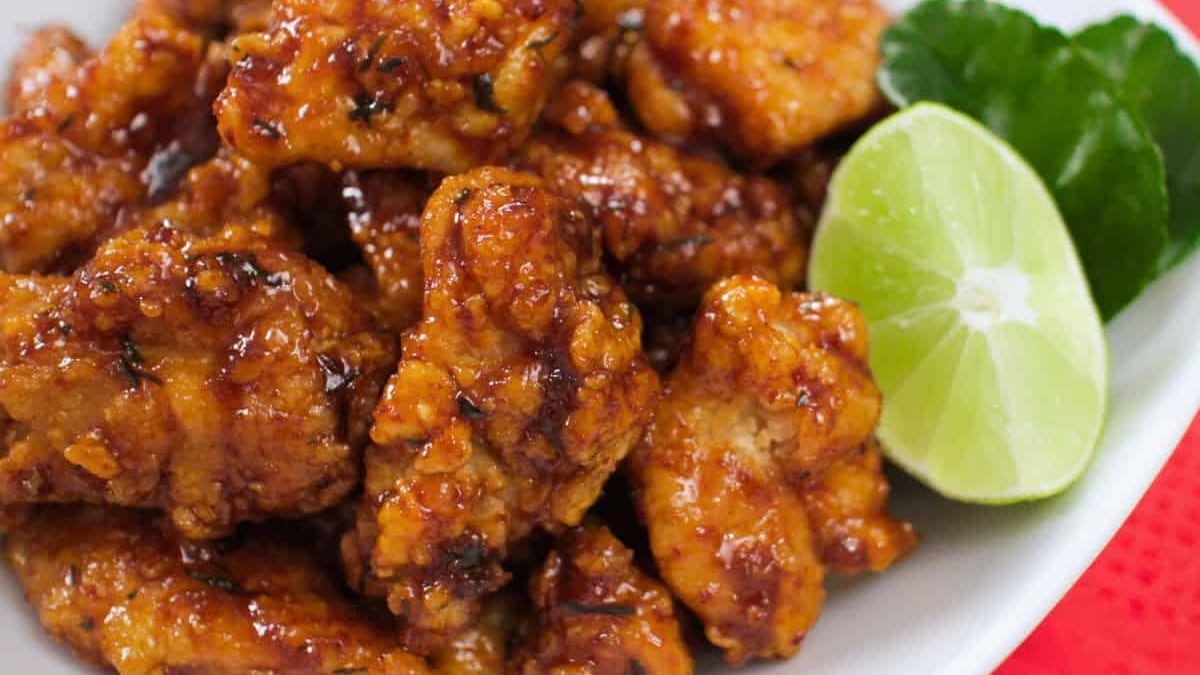
Hot Thai Chicken
When I first started Hot Thai Kitchen, I was concerned about being perceived as “legit.” I mean, a trustworthy Thai chef should be an old auntie with a thick Thai accent, right? But I was young and spoke fluent English, and I worried that people wouldn’t believe that I was actually born and raised in Thailand and therefore would question my authority.
So, in the beginning, I only made traditional dishes. But as my confidence grew, and as it became clear that people did not question my authority, I felt free to be more creative. Hot Thai Chicken(HTC) was one of the first results of that. The dish came about because on camera, I sometimes slipped and said “Hot Thai Chicken” instead of “Hot Thai Kitchen.” I often joked with Adam that HTC should be an actual dish, and one day I decided to create it.
I took inspiration from the most popular dish at a restaurant where I worked—strips of fried chicken breasts tossed in a souped-up sweet chili sauce. It was great, but I knew it could be much better. I wanted the sauce to be more complex, more aromatic, and less sweet. And, of course, I had to use chicken thighs. I love this so much that now, whenever I make it for my family, we talk about starting an HTC food truck after I retire from teaching!
| Portion size | Do-ahead Tips | Cook Time |
|---|---|---|
| Serves 4 as appetizer, 2 as entrée | The sauce can be made a few days ahead. The chicken can be fried up to 1 day ahead, then re-fried or air-fried to reheat. | 45 mins |
Ingredients for the Fried Chicken
- 4 boneless, skinless chicken thighs
- 1 egg
- 2 Tbsp + 1/4 cup (45 g) cornstarch
- 1/4 tsp table salt
- 3/4 cup (112 g) all-purpose flour
- Neutral oil, for frying
Ingredients for the Sweet Chili Lime Sauce
- 0.2 oz (6 g) dried chilies (see note below)
- 3 Tbsp (36 g) granulated sugar
- 3 Tbsp (45 ml) oyster sauce
- 2 Tbsp (30 ml) Thai chili paste
- 2 Tbsp (30 ml) water
- 11/2 Tbsp (22 ml) white vinegar
- 1 Tbsp (15 ml) fish sauce
- 3 cloves (15 g) garlic, grated or minced
- 3 makrut lime leaves
- Zest of 1/2 lime
- 11/2Tbsp (22ml) lime juice
Note: You can use mild or hot chilies, or a combination, depending on the spice level you want. For a mild sauce ,puya or guajillo chilies are great; for hot, use any smaller chili, such as arbol. If you want zero heat, use 2tsp (5 g) paprika.
Ingredient for Serving
- Jasmine rice, for serving
Directions
- Cut each chicken thigh into six to seven pieces, then place in a mixing bowl. Add the egg, 2 Tbsp (15 g) of the cornstarch, and salt. Stir until well mixed, then let sit while you prepare the sauce.
- For the sauce, cut the chilies into chunks and grind into a powder in a coffee grinder.(If you want to lessen the heat of your chilies, remove the seeds and pith before grinding.)
- In a small pot, combine the ground chilies, sugar, oyster sauce, Thai chili paste, water, vinegar, fish sauce, and garlic. Stir and bring to a simmer over medium heat. Simmer for 4–5 minutes until thickened, stirring frequently; it should look too thick to coat the chicken now, but we will thin it out later.
- While the sauce is simmering, julienne the makrut lime leaves as finely as you can, then take the juliennes and finely mince them so you end up with tiny bits of lime leaves. Once the sauce is done simmering, stir in the minced lime leaves and the lime zest, then turn off the heat and stir in the lime juice. Keep covered while you fry the chicken.
- Whisk the flour and remaining 1/4 cup (30 g) of cornstarch in a large mixing bowl. Give the chicken a quick stir and then pour it all into the flour mixture and toss until the pieces are well coated, making sure that no chicken pieces are stuck together. If you want a thicker crust, drizzle a little water over the chicken and toss one more time; the water will help the chicken pick up a little more flour. Let sit while you heat up the oil.
- In a medium pot or wok, heat about 2 inches (5 cm) of neutral oil over medium-high heat to 375°F (190°C). Line a plate with paper towel. Grab one piece of chicken at a time with tongs, shake off any loose flour, then place it into the oil. Be careful not to overcrowd the pot; you’ll need to fry in two or three batches. Fry for 21/2–3 minutes until the chicken is golden brown, then remove and drain on the paper towel.
- Pour the sauce into a large mixing bowl, using a rubber spatula to get all the sauce out, as you will need it all. Add the chicken to the sauce and quickly toss with a large spoon until all the pieces are coated. If you feel like there isn’t enough sauce to go around, use the spatula to scrape the sauce off the sides of the bowl and toss again—this will stretch the sauce further. There should be just the right amount of sauce for this amount of chicken.
- Serve the chicken immediately on its own or with jasmine rice.
Mango & Sticky Rice - Kao Niew Mamuang
Kao = Rice; Niew = Sticky; Mamuang= Mango
Even though desserts are a major part of our diet, few Thai desserts are known beyond our borders. Mango and sticky rice is the best- known dessert and for good reason: it tastes amazing. The unlikely pair of mango and rice combine flawlessly, with just the right amount of saltiness from the coconut sauce for balance. Over the years I have looked for, and failed to find, another fruit that can achieve the same harmony. I have included a bonus recipe for making purple sticky rice instead of the usual white rice—not only is it beautiful, it also has a unique flavour and a chewy texture, and is more nutritious. I once took the purple sticky rice to a party, and the host loved it so much that he snuck into the kitchen and ate all the leftover rice just on its own!
| Portion Size | Prep Time + Do-ahead Tips | Cook Time |
|---|---|---|
| Serves 4-6 | At least 4 hours for soaking rice. Soak the rice the night before. Make the salted coconut sauce and crispy mung beans in advance. | 11/2 hours |
Ingredients for the White Coconut Sticky Rice
- 1 cup (200 g) white glutinous rice
- 2/3 cup (160 ml) coconut milk
- 1/2 cup (100 g) granulated sugar
- 1/2 tsp table salt
Ingredients for the Purple Coconut Sticky Rice
- 3/4 cup (150 g) white glutinous rice
- 1/4 cup (50 g) black glutinous rice
- 1/2 cup (125 ml) coconut milk
- 1/2 cup (100 g) granulated sugar
- 1/2 tsp table salt
Ingredients for the Crispy Mung Beans
- 2 Tbsp (20 g) shelled, split mung beans
- 2 cups (500 ml) water
Ingredients for the Salted Coconut Sauce
- 1–11/2 tsp (3–5 g) rice flour
- 1 Tbsp (15 ml) water
- 1/2 cup (125 ml) coconut milk
- 1/4 tsp table salt
Other Ingredients
- 2–3 sweet, ripe mangoes, estimate 1 mango for 2 people
Directions for the Coconut Sticky Rice
- If making white sticky rice: Wash the rice by covering it with cold water and swishing it around vigorously with your hands until the water is cloudy. Pour off the water and repeat four or five times, until the rinse water runs almost clear. Soak the rice in cold water for at least 4 hours or overnight. Drain the rice well, shaking off as much residual water as possible, then steam it according to the instructions on the next page.
- If making purple sticky rice: Rinse the black rice once and place into a heatproof bowl. Pour 1 cup (250 ml) of hot-off-the-boil water over the black rice, then cover the bowl and steep for at least 30 minutes.
- Meanwhile, wash the white rice by covering it with cold water and swishing it around vigorously with your hands until the water is cloudy. Pour off the water and repeat four or five times, until the rinse water runs almost clear. Drain and set aside.
- After the black rice has soaked for at least 30 minutes, if the water is still warm, add ice cubes or cold water to cool it down to room temperature. Add the white rice to the black rice, and let the two soak together in the purple water for at least 4 hours or overnight.
- To steam the rice: Preheat a steamer over high heat until the water boils vigorously. If using a rack-style steamer, line the perforated rack with muslin or a double layer of cheese cloth and pour the rice into the middle of the rack, leaving space around the edges to allow steam to come up. Fold the edges of the cloth to cover the rice and steam for 20–25minutes, or until the rice is fully cooked. You can also use a traditional bamboo cone steamer.
- While the rice steams, make a coconut syrup by combining the coconut milk, sugar, and salt in a small pot and stirring over medium heat just until the sugar is dissolved. Remove from the heat and cover the pot to keep warm.
- When the rice is done, immediately transfer it to a heatproof mixing bowl and quickly pour the warm coconut syrup over it. Stir to mix well. Cover and let the rice absorb the syrup for 20 minutes. After 20 minutes, fold the bottom part of the rice up to the top with a rubber spatula, then cover and let sit for at least another 20 minutes before serving.
Directions for the Crispy Mung Beans
- Rinse the beans twice in cold water, then put them in a small pot and add 2 cups (500 ml) of cold water. Over medium heat, bring the water to a gentle boil. As soon as the water boils, remove from the heat and cover the pot; let sit for 10 minutes. Drain and rinse the beans in cold water, then let them dry off on paper towel.
- In a lightly greased sauté pan, toast the beans over medium-high heat, stirring frequently. (Stir gently in the beginning, as they will be soft.) When they are dry and crunchy, and have turned a light golden brown, they are done, about 7–8 minutes. Cool on a plate and store in an airtight container until ready to use.
Directions for the Salted Coconut Sauce
- In a small pot, stir the rice flour and water until completely dissolved, then stir in the coconut milk and salt. Cook over medium- high heat, stirring constantly, just until it boils. Remove from the heat.
- To serve, place a portion of sticky rice on a plate, drizzle with salted coconut sauce, sprinkle with crispy mung beans, and serve beside freshly cut mango. The rice should be served at room temperature or slightly warmed. To reheat refrigerated sticky rice, spray it with a little water and microwave until hot and soft. Serve warm.
Northern-Style Pork & Tomato Dip - Nam Prik Ong
Nam prik = A type of dip; Ong = No apparent meaning, but possibly comes from the word “om,” meaning to stew for a long time, in the Northern dialect
This iconic Northern dip is perhaps the best nam prik to get started with because it’s not too far from Western flavours, unlike many other nam prik, which can be a bit of a shock to the palate. In fact, it is somewhat reminiscent of the Italian Bolognese sauce, but spiked with Thai herbs. It’s usually a part of a bigger Thai meal, and a must-have during kantoke, the traditional Northern feast. I once served nam prik ong as an appetizer at a party alongside some rice crackers and veggies, and people were still raving about it the next day!
| Portion Size | Prep Time + Do-ahead Tips | Cook Time |
|---|---|---|
| Makes 11/2 cups (375 ml) | If soaking dried chilies, allow 1 extra hour(see directions). Make the dip up to a few days before serving. | 45 minutes |
Ingredients
- 2 oz (60 g) shallots, halved lengthwise
- 6 cloves (30 g) garlic,3 kept whole, 3 finely chopped
- 0.3 oz (10 g) red dried chilies, seeded (You can choose spicy or mild dried chilies, or a combination, depending on how hot you want the dip to be. For mild, I use guajillo or puya chilies, for spicy I use arbol)
- 1/4 tsp table salt
- 2 cilantro roots or 6–8 stems, finely chopped
- 3.5 oz (100 g) grape tomatoes, each cut into 4–6 pieces
- 7 oz (200 g) ground pork
- 1 tsp fermented shrimp paste
- 11/2Tbsp (22 ml) vegetable oil
- 1/2 cup (125 ml) pork or chicken stock, unsalted (p. 232), or water
- 2–3 tsp (10–15 ml) fish sauce
- 2 tsp (8 g) packed finely chopped palm sugar
- 1–2 tsp (5–10 ml) tamarind paste or lime juice (optional)
- Cilantro leaves (optional, for garnish)
Other Ingredients
- Fresh vegetables for dipping, such as carrots, cucumber, and cabbage
- Sticky rice or jasmine rice
- Crispy fried pork rind
- Plain rice crackers
Directions
- Grill or broil the shallots and whole garlic cloves until the edges are caramelized (this step is optional, but if you have time, it will add a nice flavour). Chop them into small pieces.
- Grind the dried chilies into a powder using a spice/coffee grinder and transfer to a heavy-duty mortar and pestle OR soak the chilies in water for at least 1 hour until softened, cut into small chunks, then pound into a paste in the mortar and pestle.
- To the chilies, add the salt, cilantro roots, grilled shallots, and grilled garlic; pound into a paste—this doesn’t have to be as fine as curry paste, but there should be no big chunks. Add the grape tomatoes and crush them with the pestle to release all their juices. Add the ground pork and shrimp paste, and pound to mix thoroughly; if there’s not enough room in the mortar, transfer to a large mixing bowl and knead the pork with the herb paste thoroughly.
- Heat the oil in a small sauté pan or a wok over medium heat. Add the chopped garlic and stir until it turns golden brown. Add the pork mixture and cook, mashing the pork with a spatula to break up any lumps. When the pork is no longer clumping, add the stock, fish sauce, and sugar; stir constantly until the pork is fully cooked.
- Simmer the pork on low heat, stirring frequently, for 5–7 minutes or until the mixture has reduced to very thick and the tomatoes have broken down completely.
- Depending on the acidity of the tomatoes, you may or may not need to add tamarind paste. Taste the dip once it has reached the desired consistency, adjust the amount of fish sauce and sugar if needed, then if it still lacks sharpness, add a touch of tamarind paste to brighten it up.
- To serve, transfer into a small bowl, garnish with cilantro, and serve warm alongside your “dippers” of choice (see ingredient list for options). If serving with sticky rice, you can roll the sticky rice into a bite-sized ball and press your thumb into it to make a little crater to hold the dip! Rice crackers aren’t traditionally served with this dip, but they’re a convenient option that I think is delicious.